SKU: OT760-D37 Artikelnummer: AA115 EAN: 8720589817258

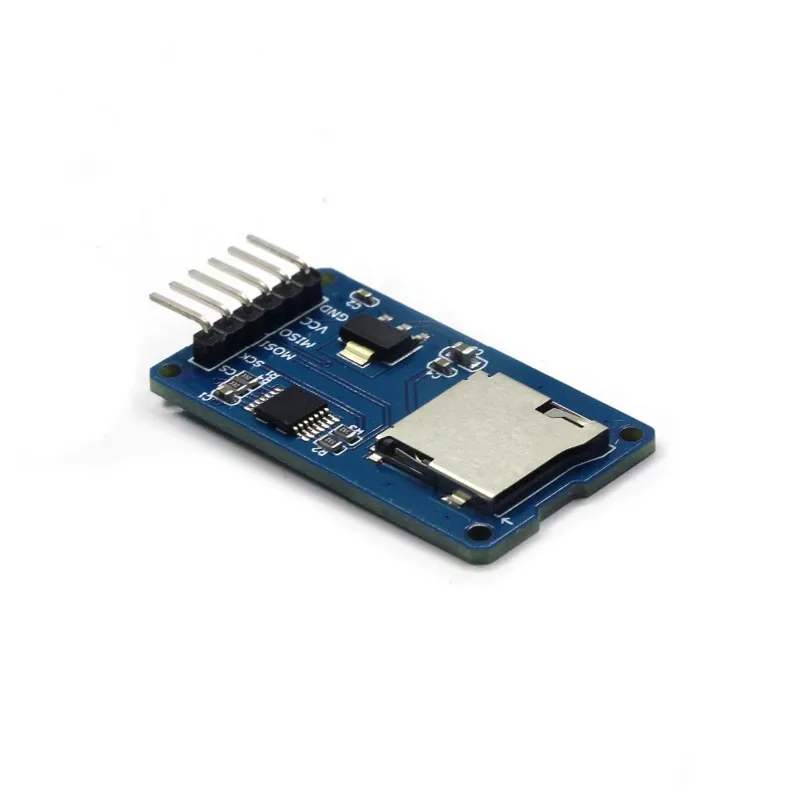
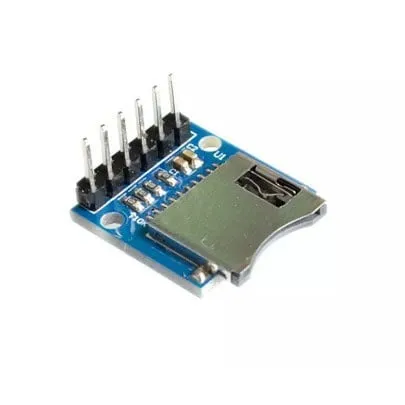
Dieser micro SD Kartenleser ist geeignet für den Arudino, ESP8266, ESP32, Wemos etc. Ist bereits Teil der standardmäßigen Arduino-Bibliothek.
Ideal zum Lesen und Schreiben von Dateien. Die Speicherkapazität wird durch die eingesetzte micro SD Karte bestimmt.
Kartentyp: Micro SD bis max. 2GB und Micro SDHC bis max 32GB
Schaltkreisstrom: 3.3V und 5V
Anschlüsse: VCC, GND, MISO, MOSI, SCK/SPI und CS
So schließt du den Micro SD Kartenleser für Arduino an einen Arduino UNO oder ESP32 an, mit einem Beispiel-Sketch, den du direkt hochladen kannst.
Dieses Projekt zeigt, wie man einen 5V Micro-SD-Kartenleser über SPI-Kommunikation mit einem Arduino Uno verbindet. Der Sketch initialisiert die SD-Karte, schreibt eine Zeile Text in eine Datei mit dem Namen test.txt und liest die Datei anschließend im Seriellen Monitor zurück. Öffnen Sie den Seriellen Monitor mit 115200 baud, um die Ausgabe anzuzeigen.
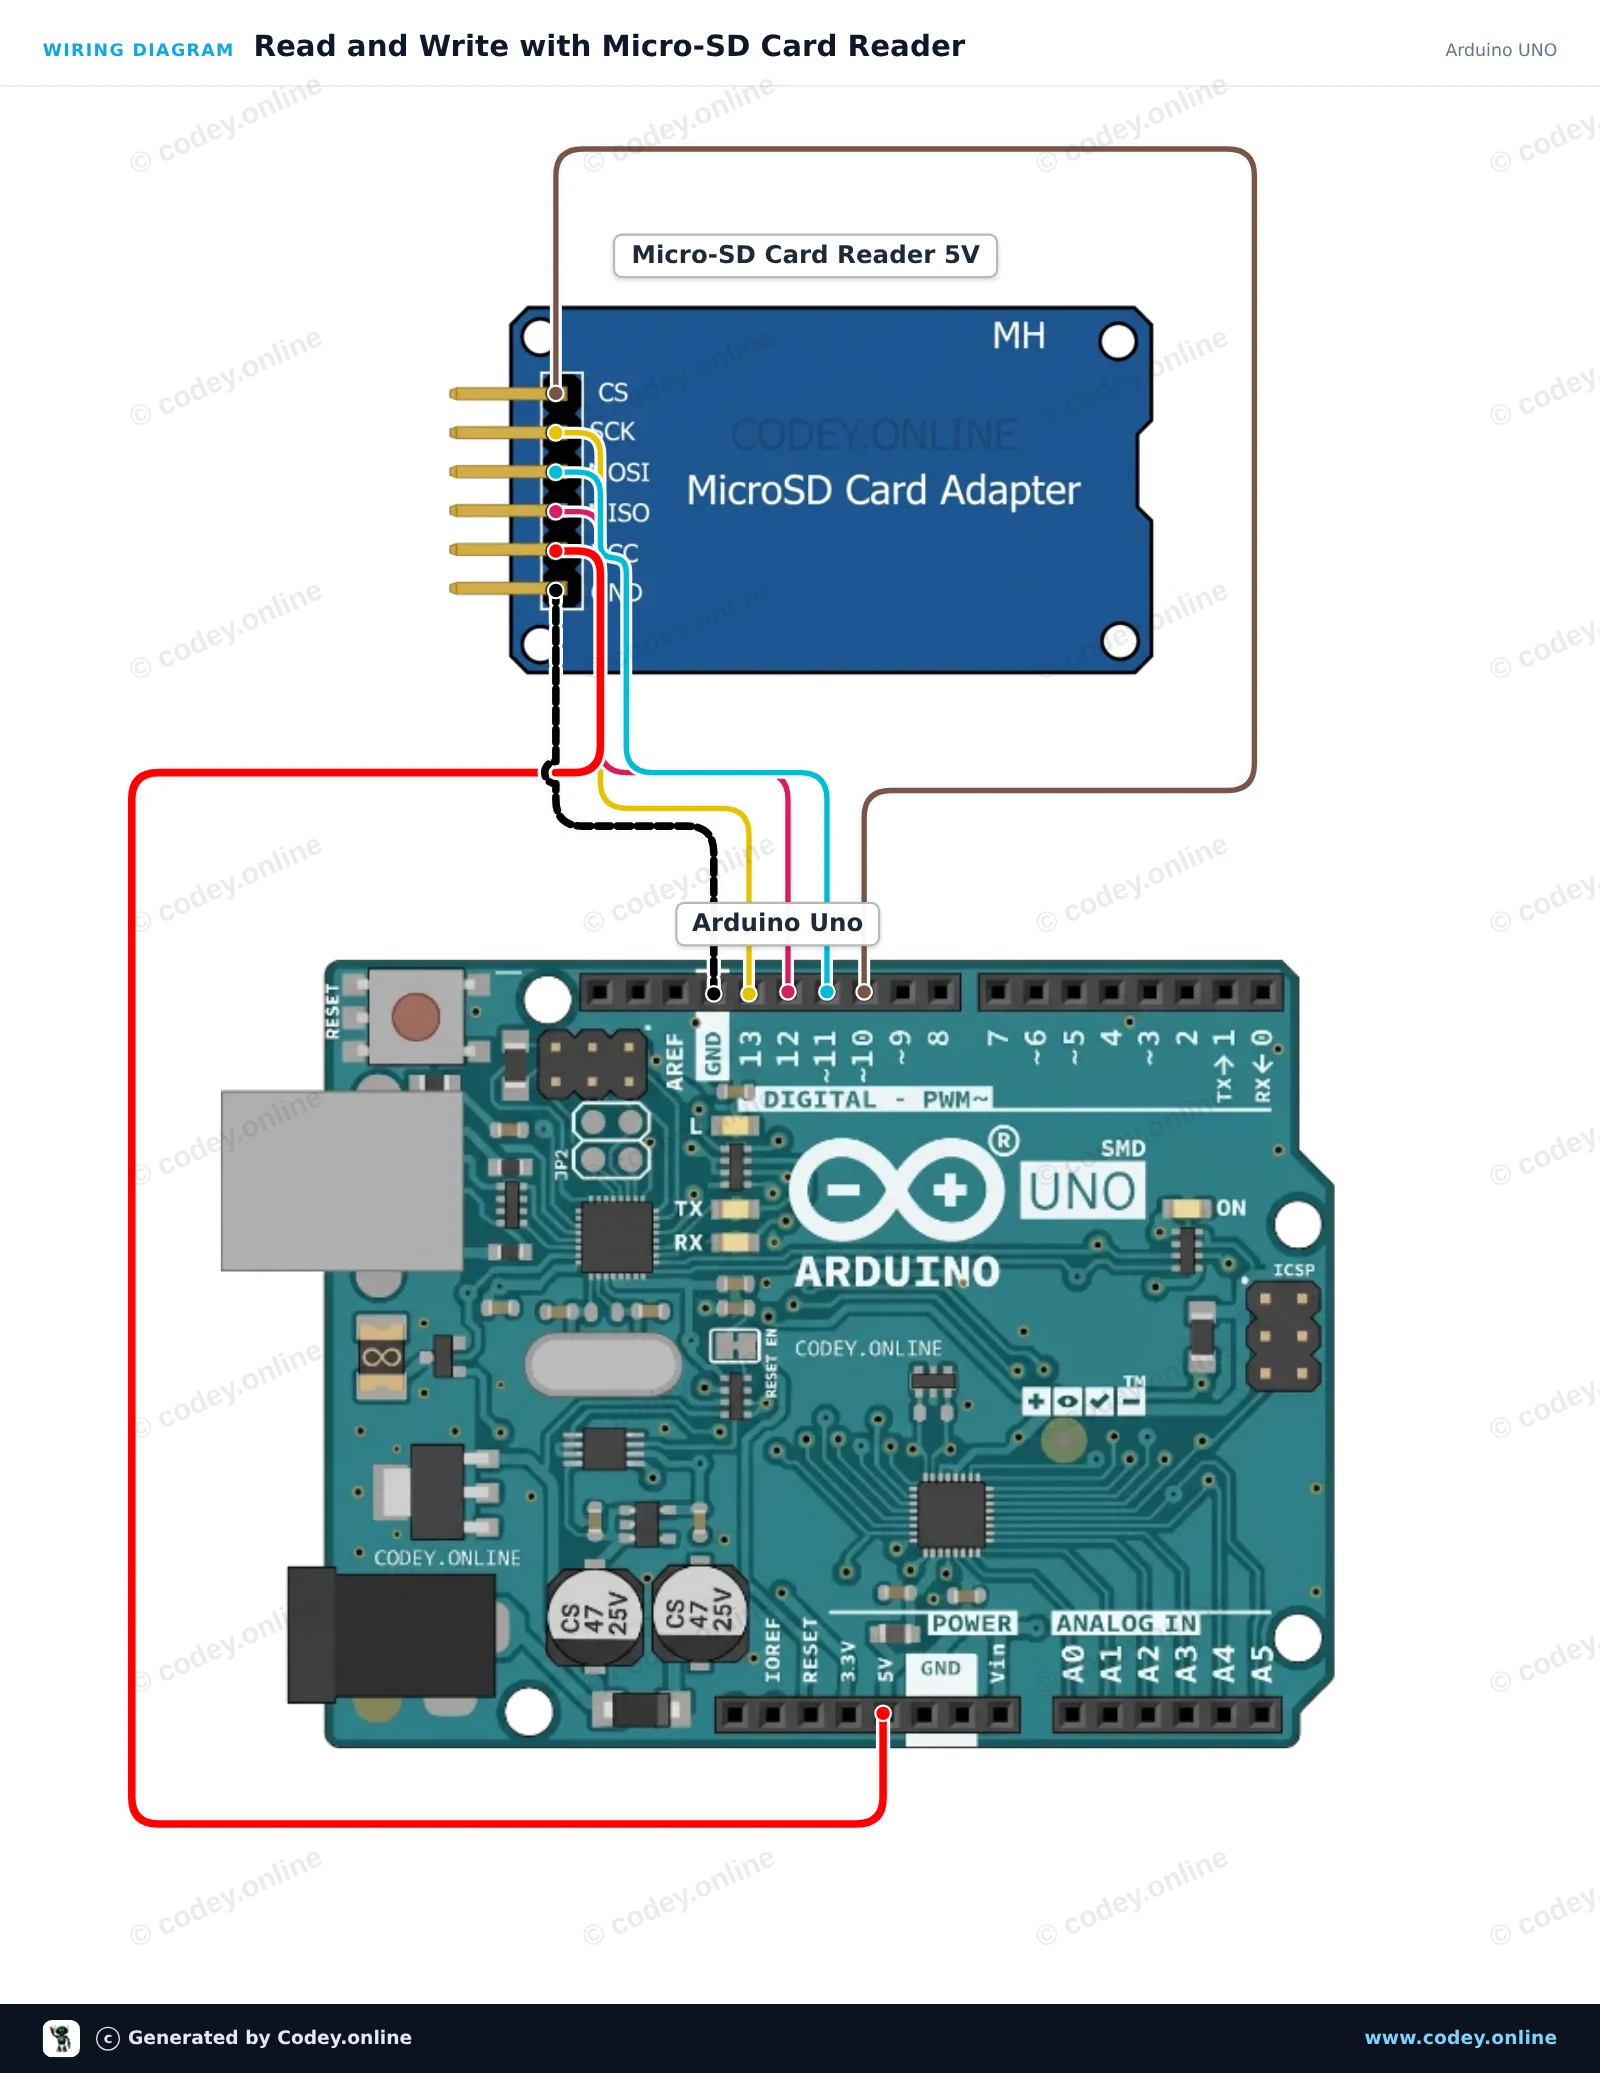
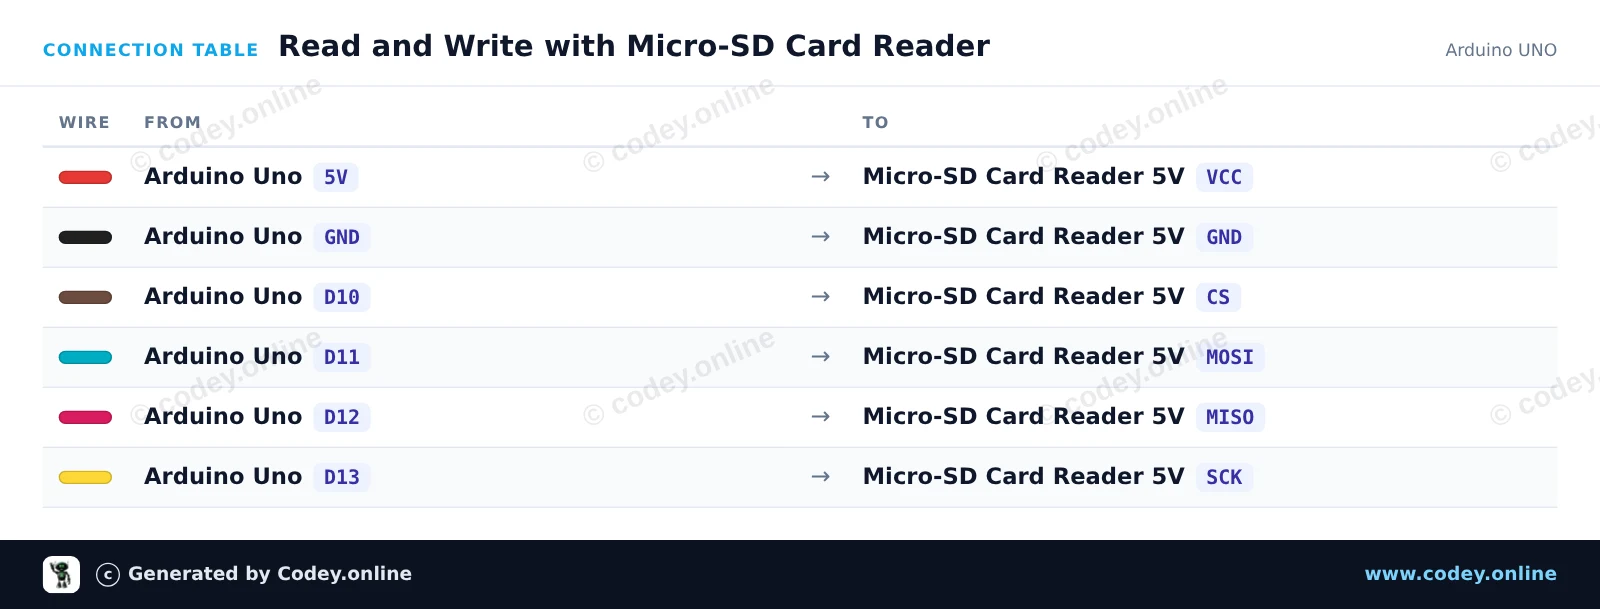
/*
 * ==================================================================
 *  Generated by Codey.online  —  https://www.codey.online
 * ==================================================================
 *  Project   : Read and Write with Micro-SD Card Reader
 *  Board     : Arduino UNO (arduino:avr:uno)
 *  Parts     : Micro-SD Card Reader 5V
 *  Libraries : none (built-in)
 *
 *  Codey Online is an AI-powered browser IDE for Arduino and ESP32.
 *  Describe your project and Codey writes the code, draws the wiring
 *  diagram and uploads it to your board, straight from the browser.
 *  This code is free to use, modify and share, without warranty.
 * ==================================================================
 */

#include <SPI.h>
#include <SD.h>

const int chipSelect = 10;

void setup() {
  Serial.begin(115200);
  while (!Serial) {
    ; // Wait for serial port to connect
  }

  Serial.println(F("Initializing SD card..."));

  if (!SD.begin(chipSelect)) {
    Serial.println(F("Initialization failed! Check wiring and FAT16/FAT32 format."));
    return;
  }
  Serial.println(F("Initialization done."));

  // Write data to the card
  File myFile = SD.open("test.txt", FILE_WRITE);
  if (myFile) {
    Serial.print(F("Writing to test.txt..."));
    myFile.println(F("Hello from Arduino UNO!"));
    myFile.close();
    Serial.println(F(" done."));
  } else {
    Serial.println(F("Error opening test.txt for writing."));
  }

  // Read data back from the card
  myFile = SD.open("test.txt");
  if (myFile) {
    Serial.println(F("--- Content of test.txt ---"));
    while (myFile.available()) {
      Serial.write(myFile.read());
    }
    myFile.close();
    Serial.println(F("--- End of file ---"));
  } else {
    Serial.println(F("Error opening test.txt for reading."));
  }
}

void loop() {
  // Demo runs once in setup
}Wiring diagram and example code generated by Codey.online — https://www.codey.online
Verbinden Sie das 5V MicroSD-Kartenmodul mit dem ESP32 über einen 4-Kanal-Pegelwandler, um eine sichere 3.3V-SPI-Kommunikation zu gewährleisten. Der Sketch initialisiert die SD-Karte auf dem VSPI-Bus, erstellt eine Testdatei und schreibt Daten hinein, und liest den Inhalt anschließend über den Serial Monitor mit 115200 baud wieder aus.
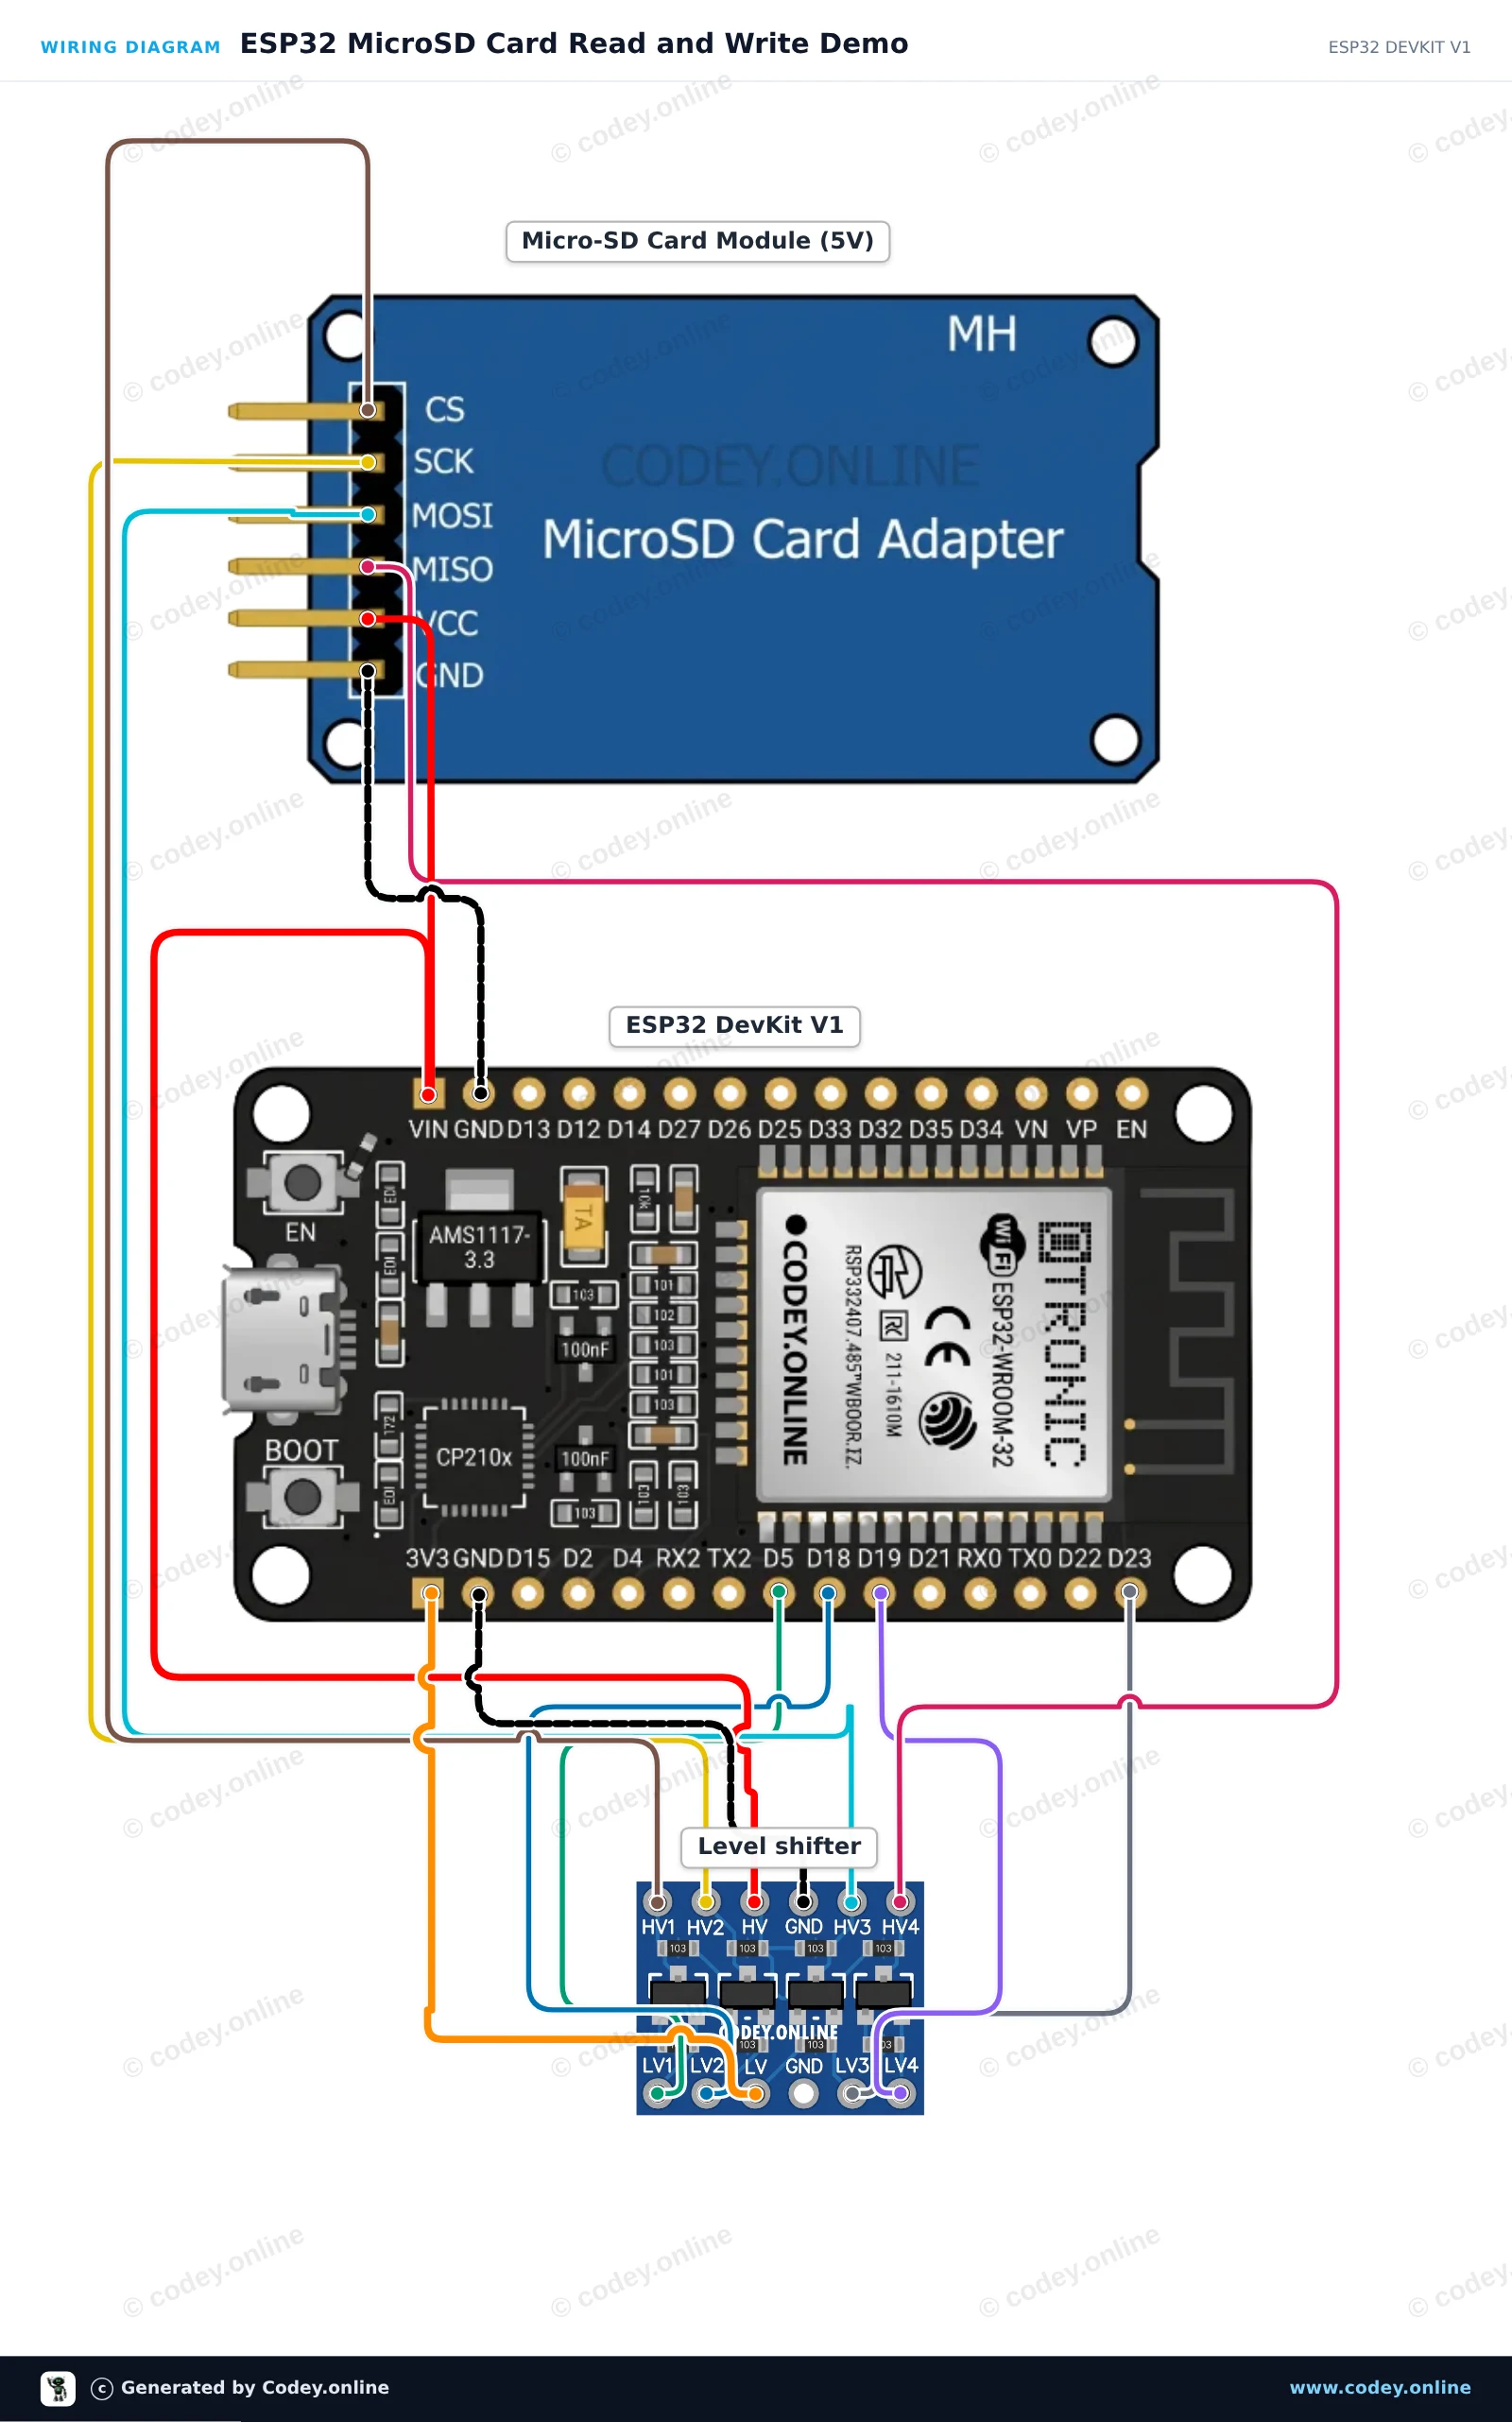
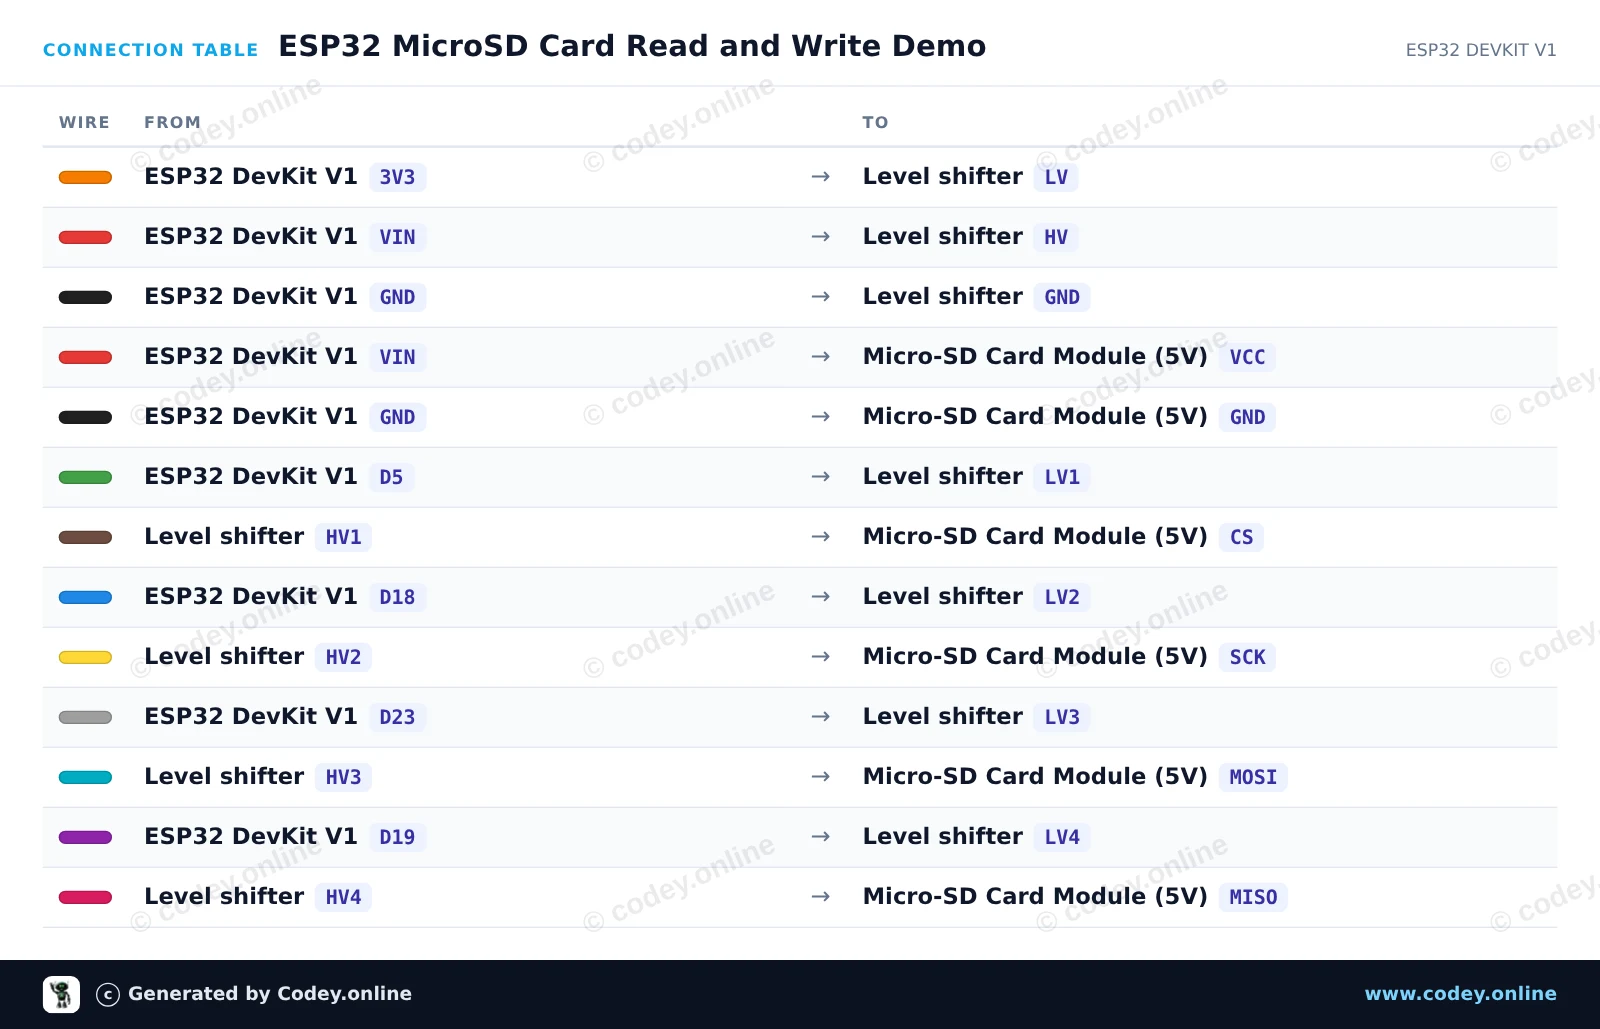
/*
 * ==================================================================
 *  Generated by Codey.online  —  https://www.codey.online
 * ==================================================================
 *  Project   : ESP32 MicroSD Card Read and Write Demo
 *  Board     : ESP32 DEVKIT V1 (esp32:esp32:esp32doit-devkit-v1)
 *  Parts     : Micro-SD Card Reader 5V
 *  Libraries : none (built-in)
 *
 *  Codey Online is an AI-powered browser IDE for Arduino and ESP32.
 *  Describe your project and Codey writes the code, draws the wiring
 *  diagram and uploads it to your board, straight from the browser.
 *  This code is free to use, modify and share, without warranty.
 * ==================================================================
 */

#include "FS.h"
#include "SD.h"
#include "SPI.h"

const int chipSelect = 5;

void setup() {
  Serial.begin(115200);
  while (!Serial) { delay(10); }

  Serial.println("Initializing SD card...");

  if (!SD.begin(chipSelect)) {
    Serial.println("Card Mount Failed! Check wiring and ensure a FAT32 card is inserted.");
    return;
  }

  uint8_t cardType = SD.cardType();
  if (cardType == CARD_NONE) {
    Serial.println("No SD card attached.");
    return;
  }

  Serial.print("SD Card Type: ");
  if (cardType == CARD_MMC) Serial.println("MMC");
  else if (cardType == CARD_SD) Serial.println("SDSC");
  else if (cardType == CARD_SDHC) Serial.println("SDHC");
  else Serial.println("UNKNOWN");

  uint64_t cardSize = SD.cardSize() / (1024 * 1024);
  Serial.printf("SD Card Size: %lluMB\n", cardSize);

  // Write to a test file
  Serial.println("Writing to test.txt...");
  File file = SD.open("/test.txt", FILE_WRITE);
  if (file) {
    file.println("Hello from ESP32 and MicroSD Card!");
    file.close();
    Serial.println("Write complete.");
  } else {
    Serial.println("Error opening file for writing.");
  }

  // Read the test file back
  Serial.println("Reading test.txt:");
  file = SD.open("/test.txt");
  if (file) {
    while (file.available()) {
      Serial.write(file.read());
    }
    file.close();
  } else {
    Serial.println("Error opening file for reading.");
  }
}

void loop() {
  // Idle
}Wiring diagram and example code generated by Codey.online — https://www.codey.online





 English
  Nederlands
  Frans
Frans  Italiano
  Español
  Suomi
Suomi  Polski
  Dansk
Dansk  Ελληνικά
  Български
  Čeština
  Hrvatski
  Aileen