SKU: OT2020-D106 Artikelnummer: AB081 EAN: 8455269820906

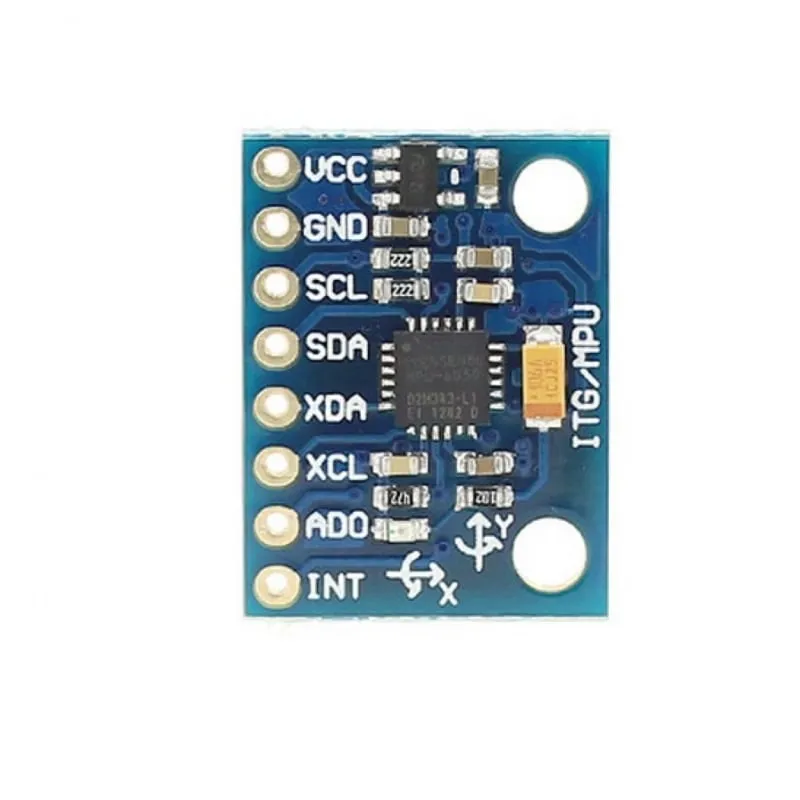
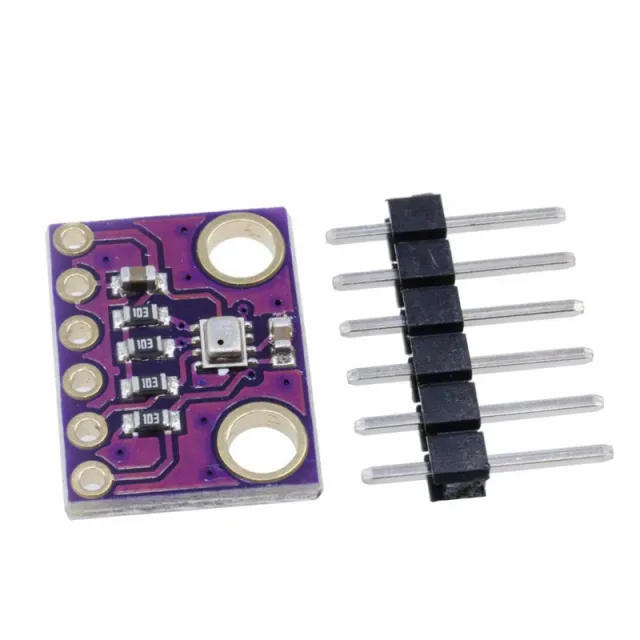
Das MPU-6050-Modul integriert einen 3-Achsen-Beschleunigungssensor und ein 3-Achsen-Gyroskop. Neben einer geringeren Größe im Vergleich zu einzelnen Lösungen löst dieses Modul auch Probleme mit Unterschieden in typischen Mehrkomponentensystemen.
Die integrierte InvenSense-Datenbank reduziert die komplexe Verarbeitung und bietet einen Rahmen für die Anwendungs- und API-Entwicklung.
I2C mit bis zu 400 kHz steht für die Datenübertragung zur Verfügung.
Technische Daten
- MPU-6050 Modul (Drei-Achsen-Gyro + Drei-Achsen-Beschleunigung)
- Stromversorgung: 3- 5 V (intern niedriger Spannungsabfall)
- Kommunikation: das standardmäßige IIC-Kommunikationsprotokoll
- Chip mit eingebautem 16-Bit-AD-Wandler, 16-Bit-Datenausgang
- Gyroskopbereich: ±250, ±500, ±1000, ±2000 °/ s (16 bits)
- Beschleunigungsbereich: ±2, ±4, ±8, ±16 g (16 bits)
- eingebauter Temperatursensor
Anwendungsbeispiele
- Bewegungserkennungsspiele
- erweiterte Realität
- elektronische & optische Bildstabilisierung
Abmessungen
Länge: 2,1cm
Breite: 1,6cm
Höhe: 0,34cm
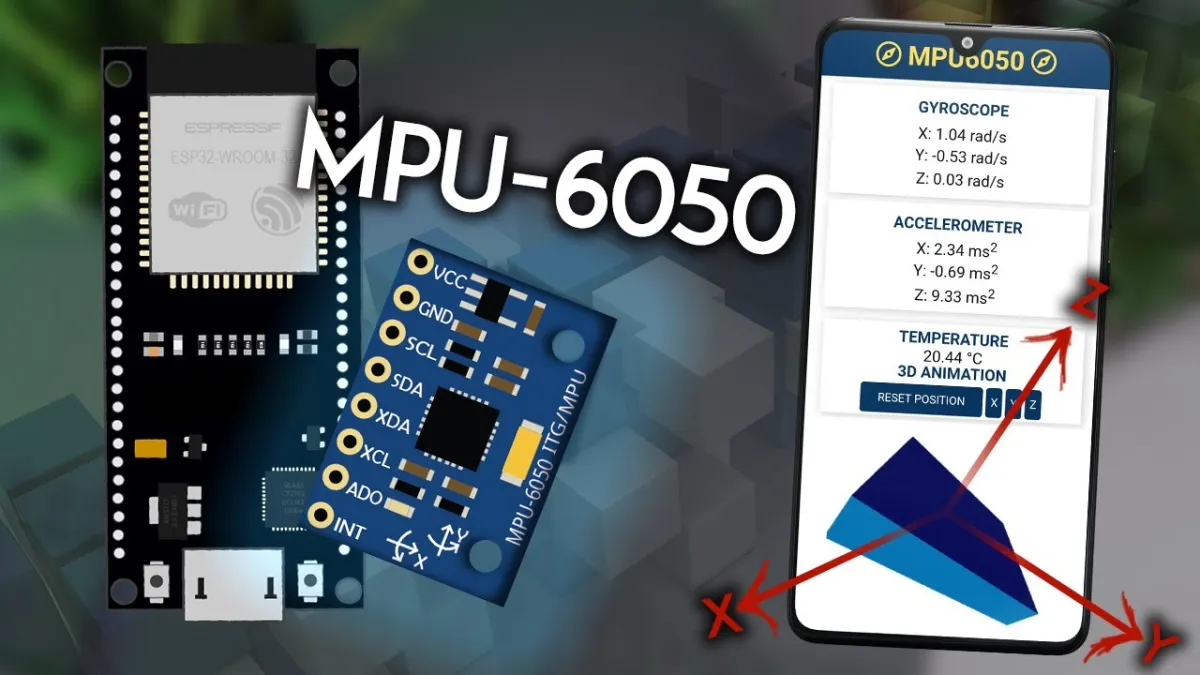
Beim Abspielen wird das Video von YouTube geladen.
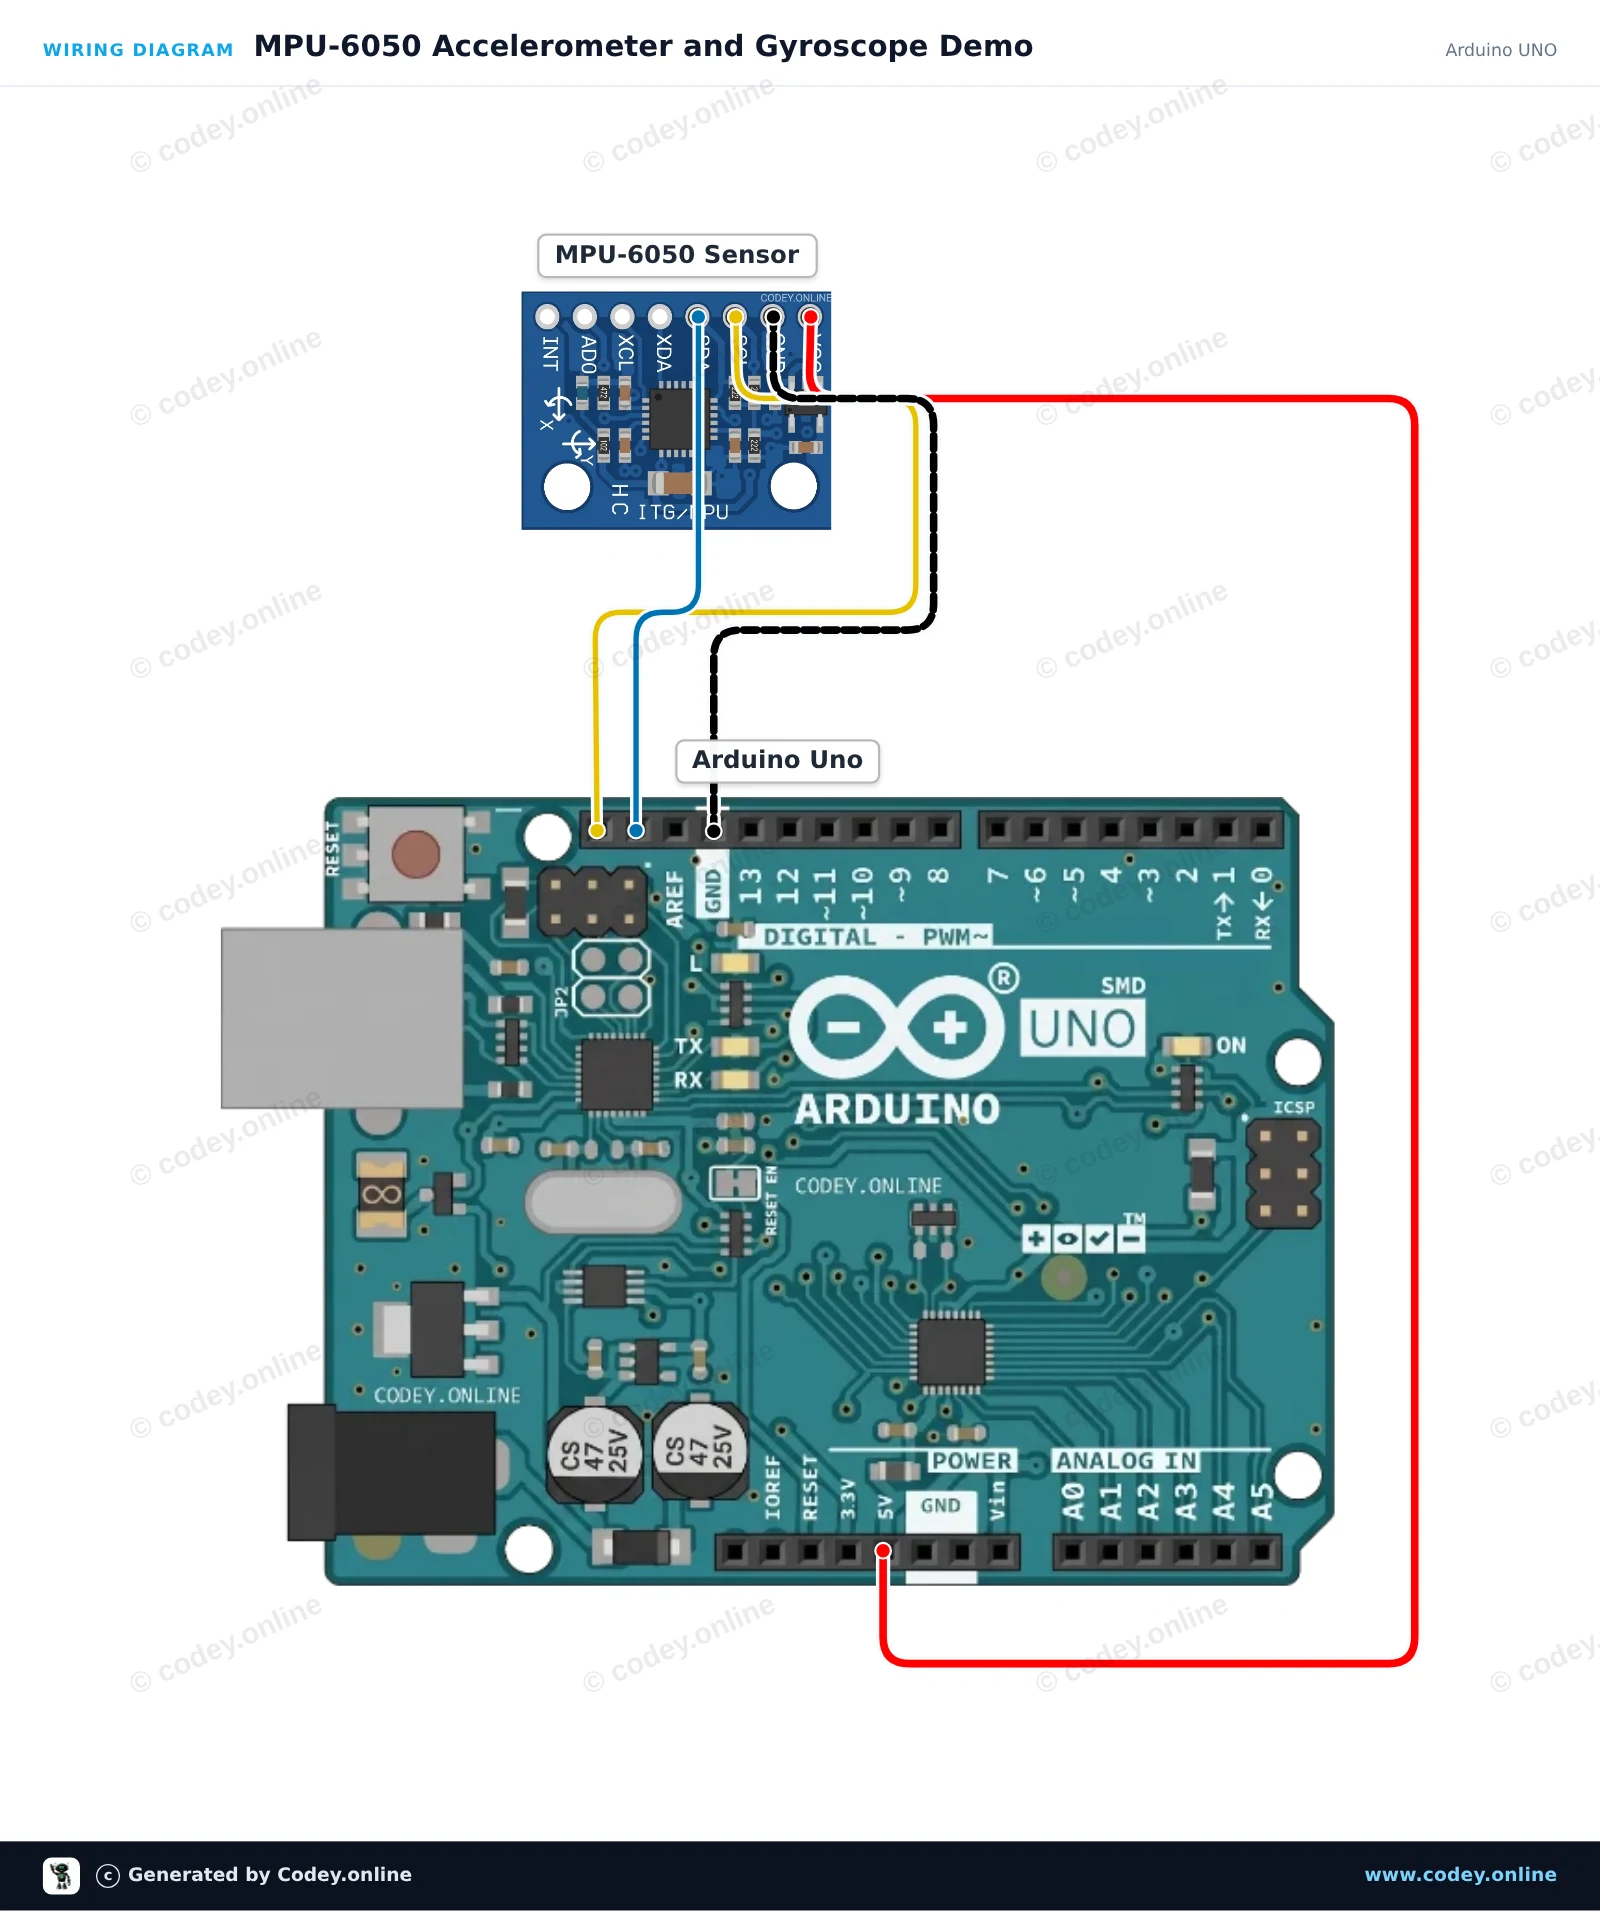
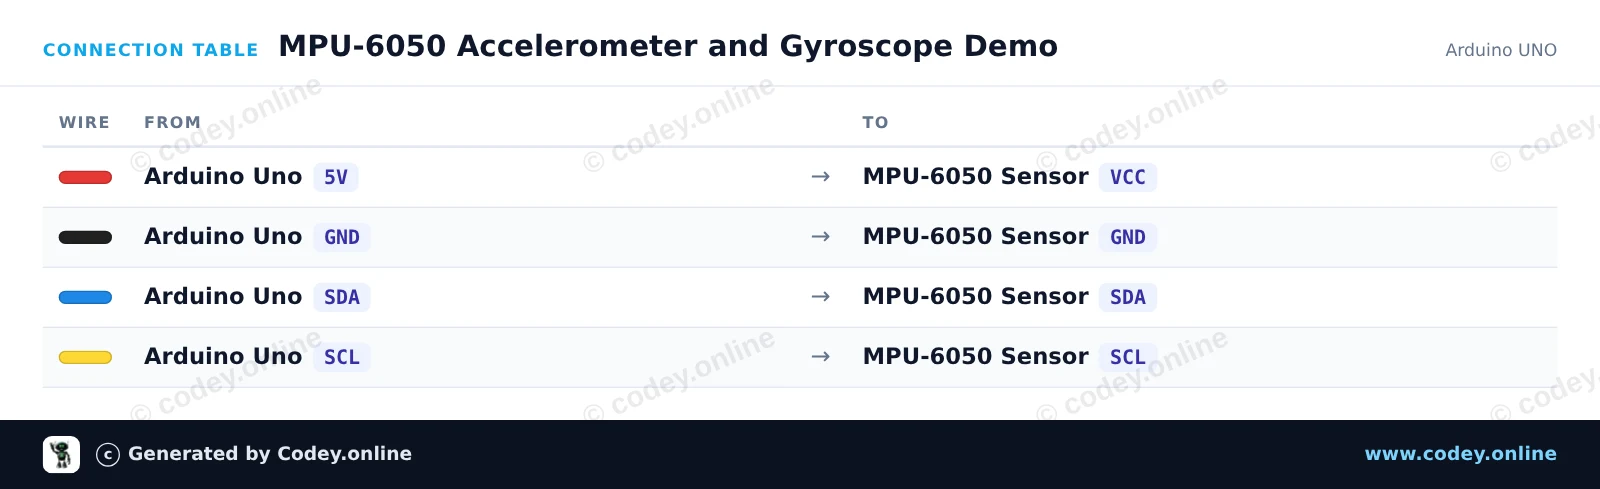
So schließt du den Beschleunigungssensor und Gyroskop I2C - MPU-6050 an einen Arduino UNO oder ESP32 an, mit einem Beispiel-Sketch, den du direkt hochladen kannst.
Dieses Projekt liest über I2C Beschleunigungs- und Winkelgeschwindigkeitsdaten vom MPU-6050 6-Achsen-Motion-Tracking-Sensor aus. Verbinde den Sensor mit dem Arduino Uno, lade den Code hoch und öffne den Serial Monitor mit 115200 baud, um die Bewegungswerte in Echtzeit zu sehen, während du das Modul kippst und drehst.
/*
 * ==================================================================
 *  Generated by Codey.online  —  https://www.codey.online
 * ==================================================================
 *  Project   : MPU-6050 Accelerometer and Gyroscope Demo
 *  Board     : Arduino UNO (arduino:avr:uno)
 *  Parts     : Accelerometer and Gyroscope I2C MPU-6050
 *  Libraries : Adafruit MPU6050 2.2.9, Adafruit Unified Sensor 1.1.15, Adafruit BusIO 1.17.4
 *
 *  Codey Online is an AI-powered browser IDE for Arduino and ESP32.
 *  Describe your project and Codey writes the code, draws the wiring
 *  diagram and uploads it to your board, straight from the browser.
 *  This code is free to use, modify and share, without warranty.
 * ==================================================================
 */

#include <Wire.h>
#include <Adafruit_MPU6050.h>
#include <Adafruit_Sensor.h>

Adafruit_MPU6050 mpu;

void setup() {
  Serial.begin(115200);
  while (!Serial) {
    delay(10);
  }

  Serial.println(F("Initializing MPU-6050..."));
  if (!mpu.begin()) {
    Serial.println(F("Failed to find MPU-6050 chip. Check connections!"));
    while (1) {
      delay(10);
    }
  }
  Serial.println(F("MPU-6050 initialized successfully!"));

  // Configure sensor ranges and filter bandwidth
  mpu.setAccelerometerRange(MPU6050_RANGE_8_G);
  mpu.setGyroRange(MPU6050_RANGE_500_DEG);
  mpu.setFilterBandwidth(MPU6050_BAND_21_HZ);
}

void loop() {
  sensors_event_t a, g, temp;
  mpu.getEvent(&a, &g, &temp);

  // Print acceleration in m/s^2
  Serial.print(F("Accel (m/s^2) X: "));
  Serial.print(a.acceleration.x, 2);
  Serial.print(F(", Y: "));
  Serial.print(a.acceleration.y, 2);
  Serial.print(F(", Z: "));
  Serial.print(a.acceleration.z, 2);

  // Print rotation rate in rad/s
  Serial.print(F(" | Gyro (rad/s) X: "));
  Serial.print(g.gyro.x, 2);
  Serial.print(F(", Y: "));
  Serial.print(g.gyro.y, 2);
  Serial.print(F(", Z: "));
  Serial.print(g.gyro.z, 2);

  // Print onboard temperature
  Serial.print(F(" | Temp: "));
  Serial.print(temp.temperature, 1);
  Serial.println(F(" C"));

  delay(500);
}Benötigte Bibliotheken: Adafruit MPU6050 2.2.9, Adafruit Unified Sensor 1.1.15, Adafruit BusIO 1.17.4
Wiring diagram and example code generated by Codey.online — https://www.codey.online
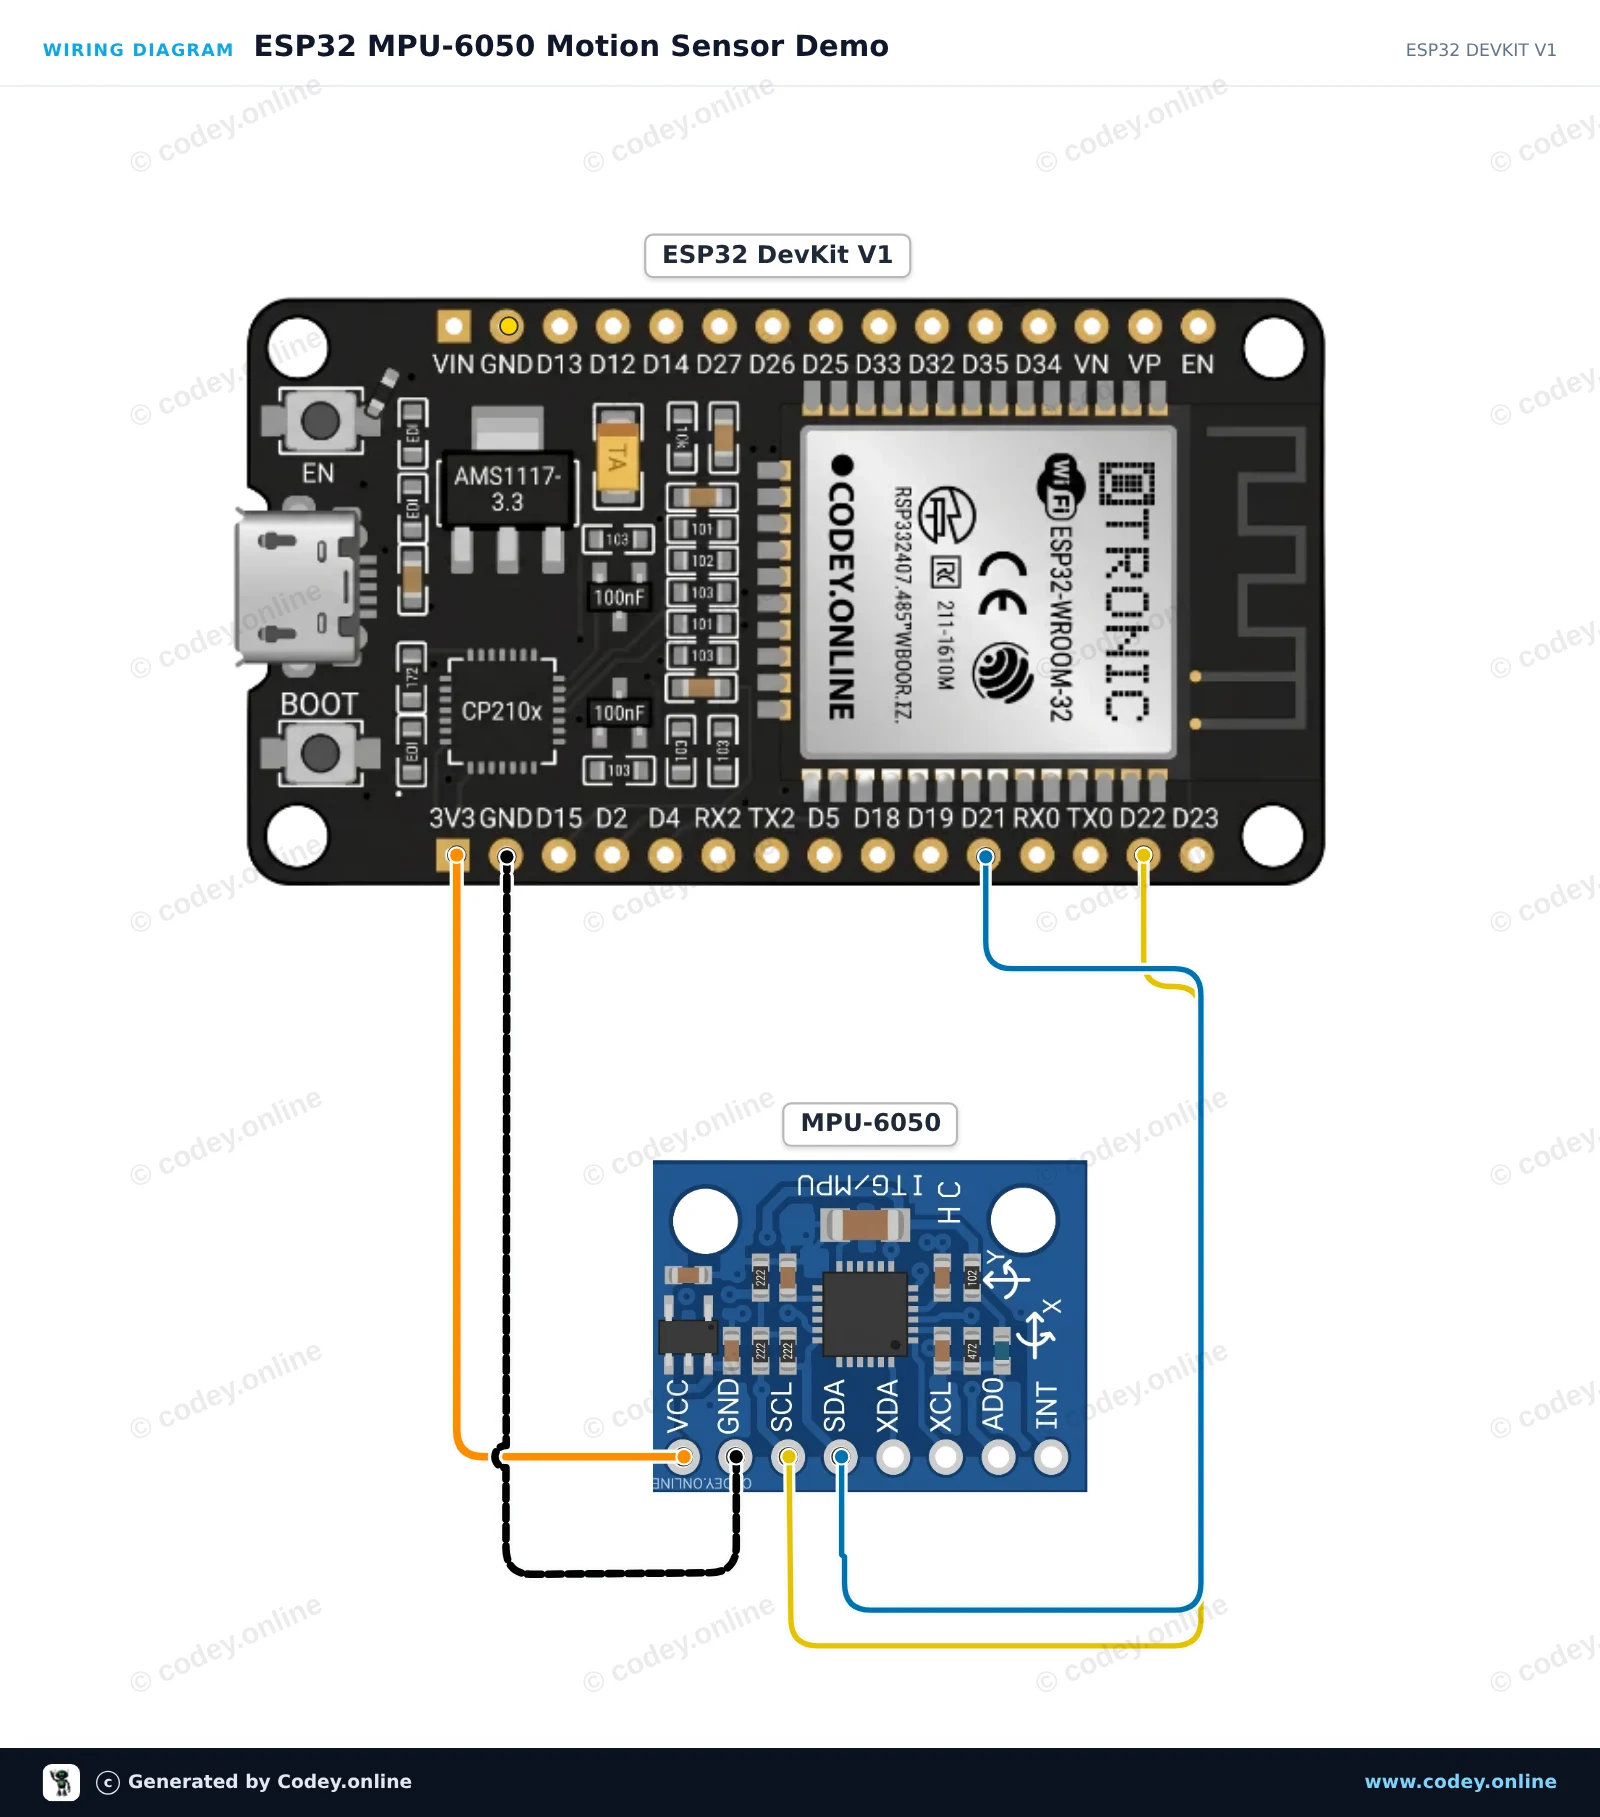
Dieses Projekt liest die 3-Achsen-Beschleunigung, die Rotationsgeschwindigkeit und die Temperatur des MPU-6050-Sensors über I2C aus. Der ESP32 liest die Sensordaten mit 10 Hz aus und gibt formatierte Werte im Serial Monitor mit 115200 baud aus. Öffne den Serial Plotter, um Live-Diagramme der Sensorbewegungen anzuzeigen.
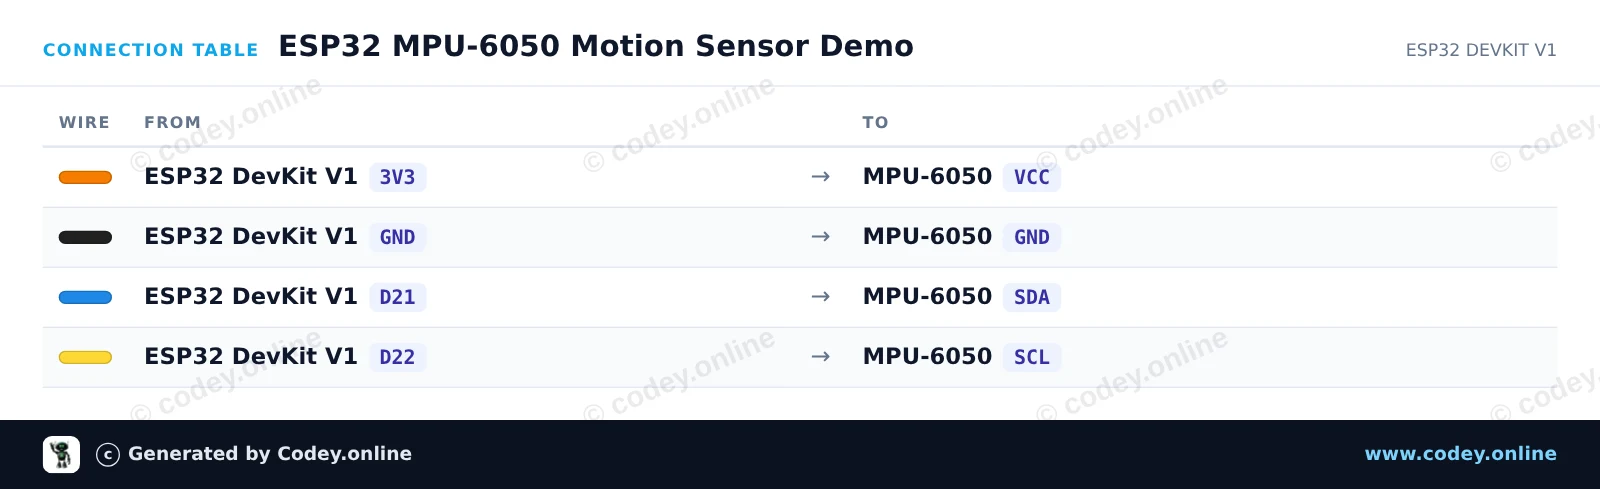
/*
 * ==================================================================
 *  Generated by Codey.online  —  https://www.codey.online
 * ==================================================================
 *  Project   : ESP32 MPU-6050 Motion Sensor Demo
 *  Board     : ESP32 DEVKIT V1 (esp32:esp32:esp32doit-devkit-v1)
 *  Parts     : Accelerometer and Gyroscope I2C MPU-6050
 *  Libraries : Adafruit MPU6050 2.2.9, Adafruit Unified Sensor 1.1.15
 *
 *  Codey Online is an AI-powered browser IDE for Arduino and ESP32.
 *  Describe your project and Codey writes the code, draws the wiring
 *  diagram and uploads it to your board, straight from the browser.
 *  This code is free to use, modify and share, without warranty.
 * ==================================================================
 */

#include <Adafruit_MPU6050.h>
#include <Adafruit_Sensor.h>
#include <Wire.h>

Adafruit_MPU6050 mpu;

void setup() {
  Serial.begin(115200);
  while (!Serial) delay(10);

  Serial.println("Initializing MPU-6050...");

  // Initialize I2C on ESP32 default pins: SDA (GPIO 21), SCL (GPIO 22)
  Wire.begin(21, 22);

  if (!mpu.begin(0x68, &Wire)) {
    Serial.println("Failed to find MPU-6050 chip!");
    while (1) {
      delay(10);
    }
  }

  Serial.println("MPU-6050 Found!");

  // Configure sensor ranges
  mpu.setAccelerometerRange(MPU6050_RANGE_8_G);
  mpu.setGyroRange(MPU6050_RANGE_500_DEG);
  mpu.setFilterBandwidth(MPU6050_BAND_21_HZ);

  delay(100);
}

void loop() {
  sensors_event_t a, g, temp;
  mpu.getEvent(&a, &g, &temp);

  Serial.print("Accel X: ");
  Serial.print(a.acceleration.x, 2);
  Serial.print(" m/s^2, Y: ");
  Serial.print(a.acceleration.y, 2);
  Serial.print(" m/s^2, Z: ");
  Serial.print(a.acceleration.z, 2);
  Serial.println(" m/s^2");

  Serial.print("Gyro X: ");
  Serial.print(g.gyro.x, 2);
  Serial.print(" rad/s, Y: ");
  Serial.print(g.gyro.y, 2);
  Serial.print(" rad/s, Z: ");
  Serial.print(g.gyro.z, 2);
  Serial.println(" rad/s");

  Serial.print("Temperature: ");
  Serial.print(temp.temperature, 1);
  Serial.println(" degC");
  Serial.println("------------------------------------");

  delay(500);
}Benötigte Bibliotheken: Adafruit MPU6050 2.2.9, Adafruit Unified Sensor 1.1.15
Wiring diagram and example code generated by Codey.online — https://www.codey.online






 English
  Nederlands
  Frans
Frans  Italiano
  Español
  Suomi
Suomi  Polski
  Dansk
Dansk  Ελληνικά
  Български
  Čeština
  Hrvatski
  Aileen