SKU: OT2043-A54 Artikelnummer: AB072 EAN: 4577243565130

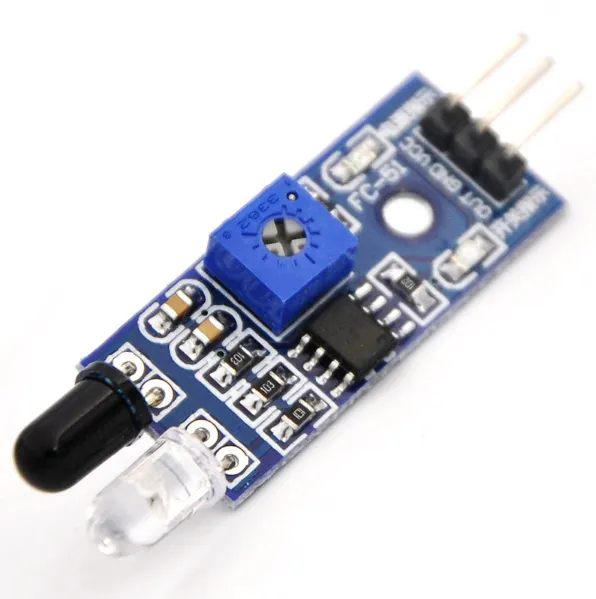
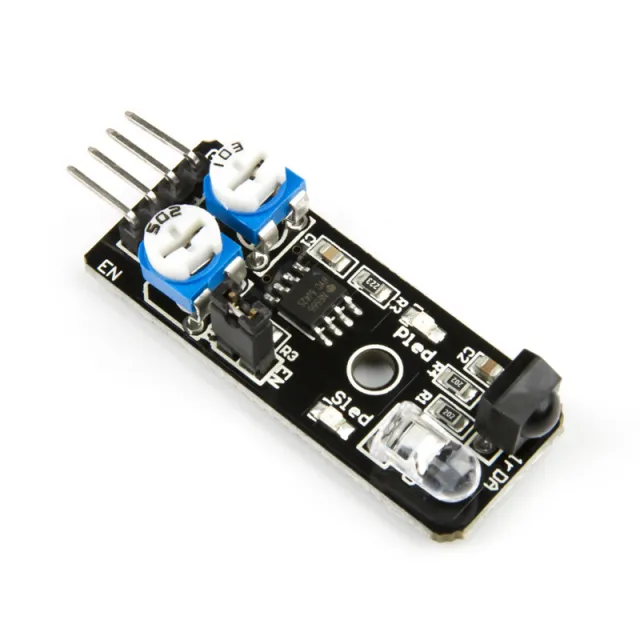
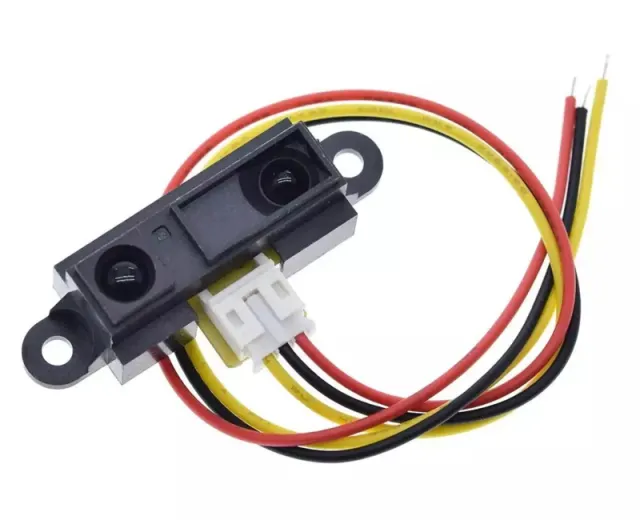
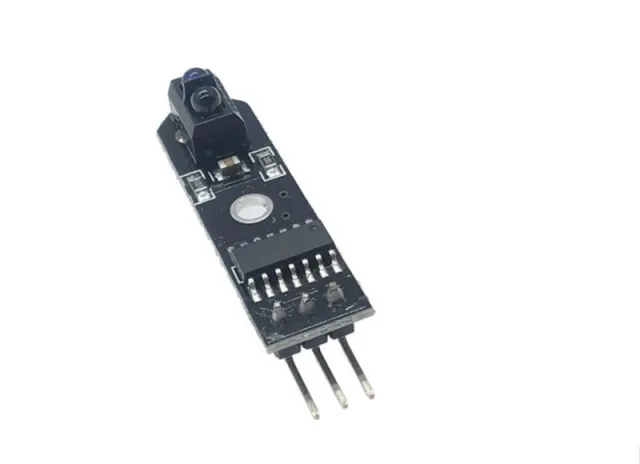
Infrarot-Hindernisvermeidungsmodul.
Gibt ein 5V-Signal aus, wenn keine Hindernisse vorhanden sind, und ein 0V-Signal, wenn ein Hindernis vorhanden ist, und die grüne LED leuchtet. Der Abstand kann mit einem Potentiometer eingestellt werden. Funktioniert mit 3.3V und 5V, hat eine rote Power-LED.
Erfasst den Abstand zu Hindernissen in einer Entfernung von 2-30cm und 35 Grad mithilfe von Infrarotsignalen. Enthält einen Infrarotsender und -empfänger.
Abmessungen
Länge: 4,5cm
Breite: 1,4cm
Höhe: 0,9cm
So schließt du den Infrarot-Hindernisvermeidungsmodul HW-201 an einen Arduino UNO oder ESP32 an, mit einem Beispiel-Sketch, den du direkt hochladen kannst.
Dieses Projekt verwendet einen HW-201 Infrarot-Hindernisvermeidungssensor, um Objekte in der Nähe zu erkennen. Wenn ein Hindernis in den Erfassungsbereich kommt, wird der digitale Ausgang des Sensors LOW, wodurch die eingebaute LED des Arduino eingeschaltet und Erkennungswarnungen im Serial Monitor ausgegeben werden. Stelle das onboard-Potentiometer am Sensormodul ein, um die Erkennungsdistanz zu kalibrieren.
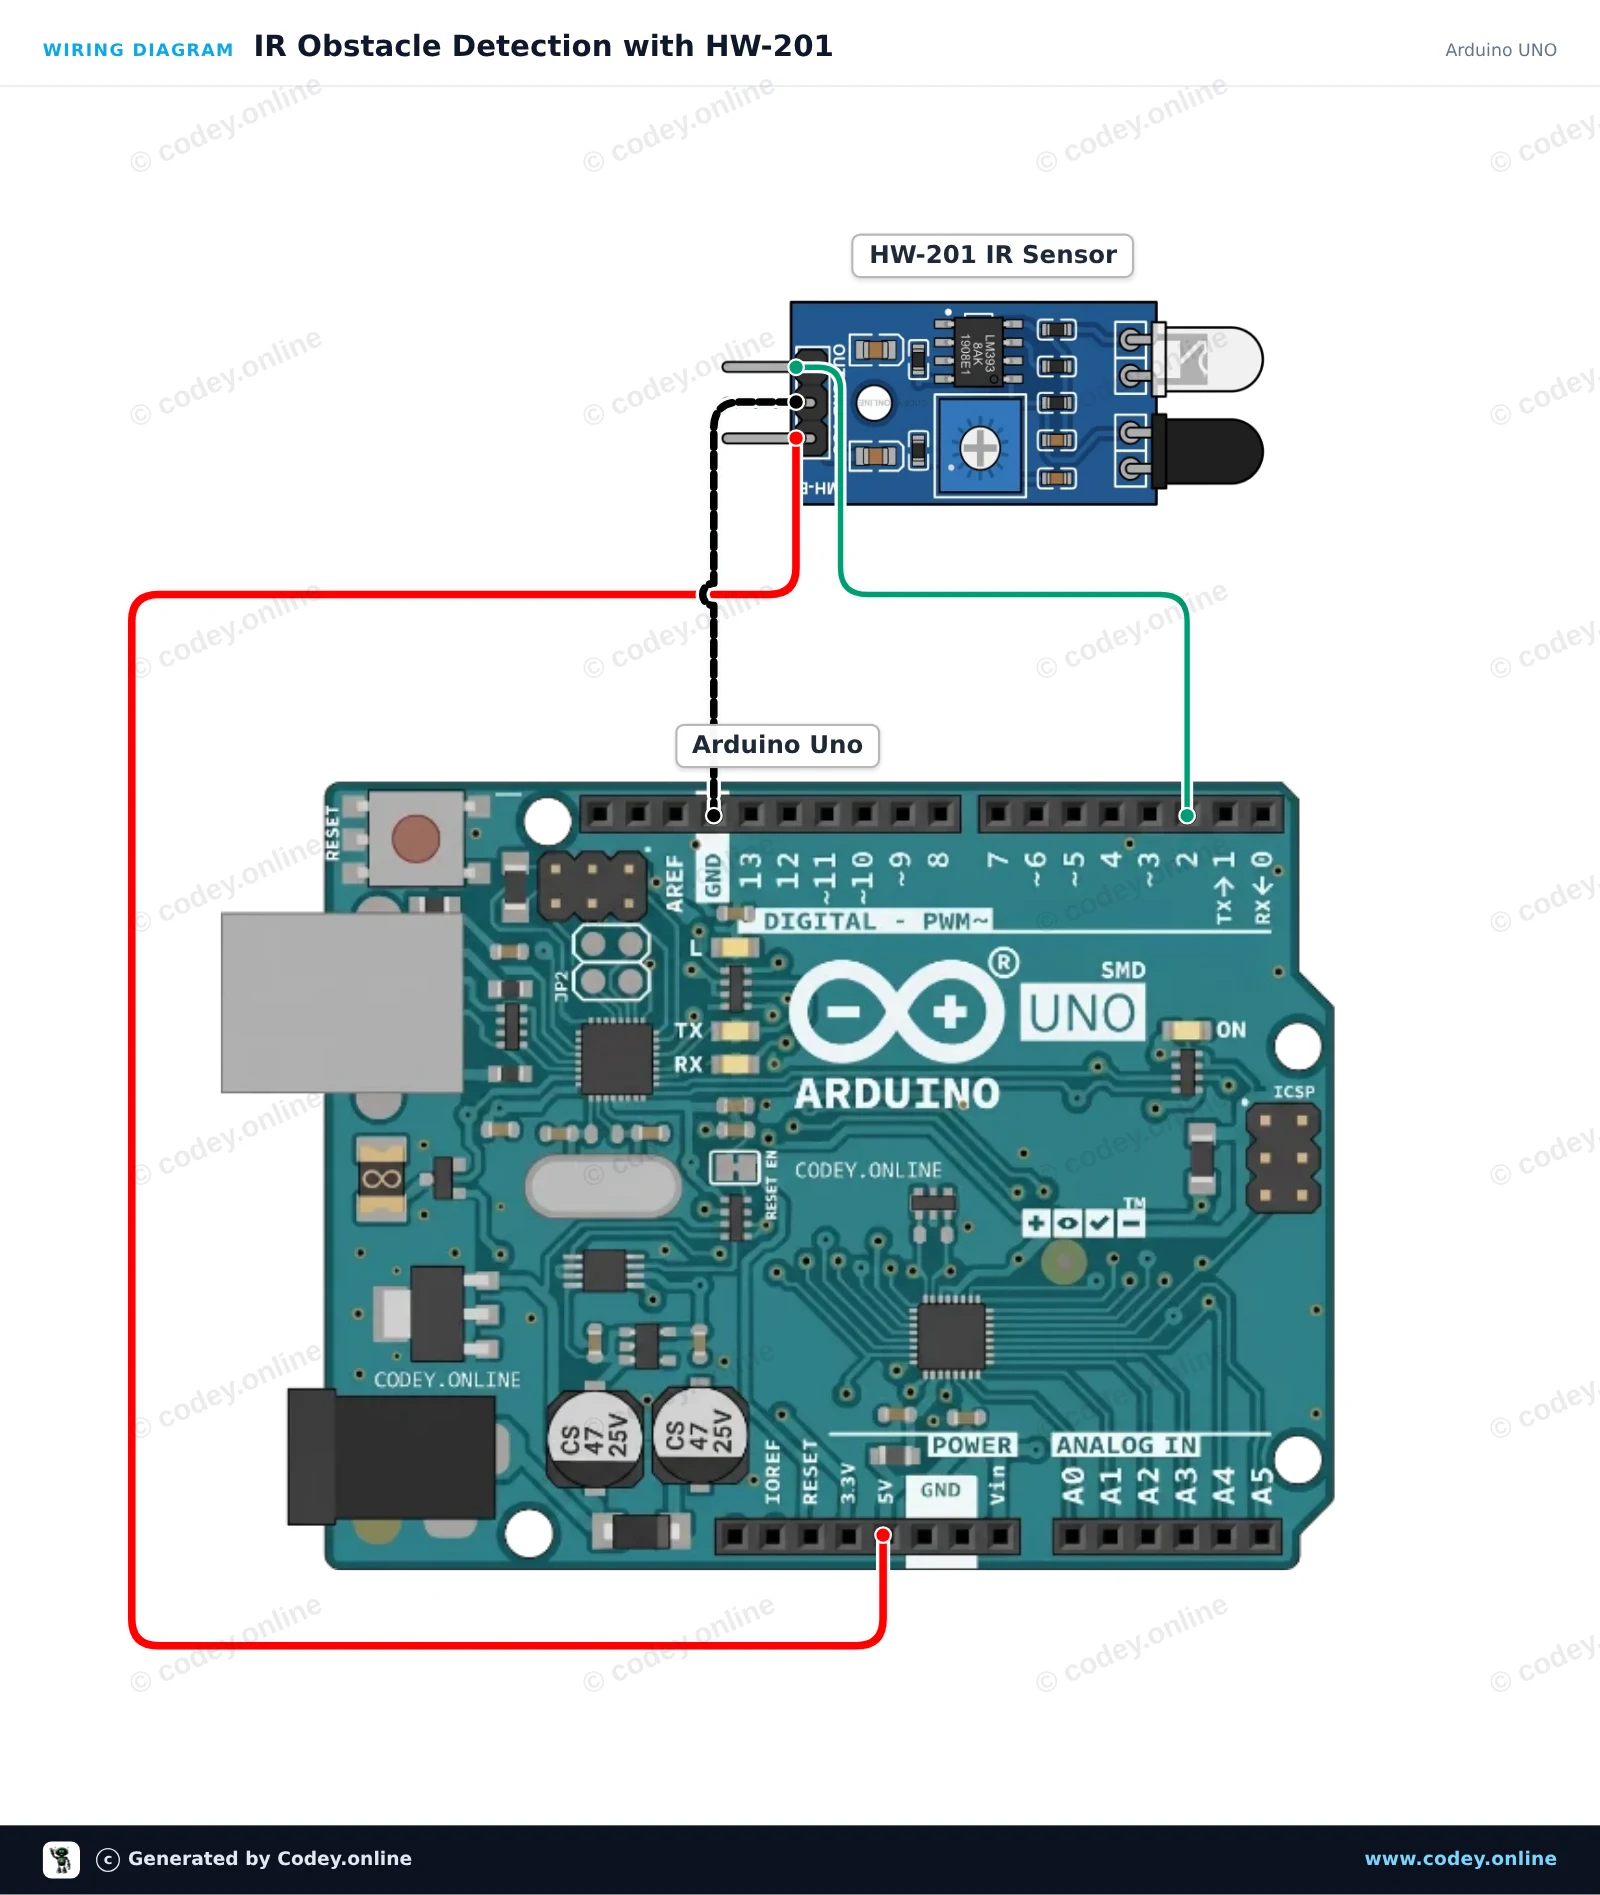
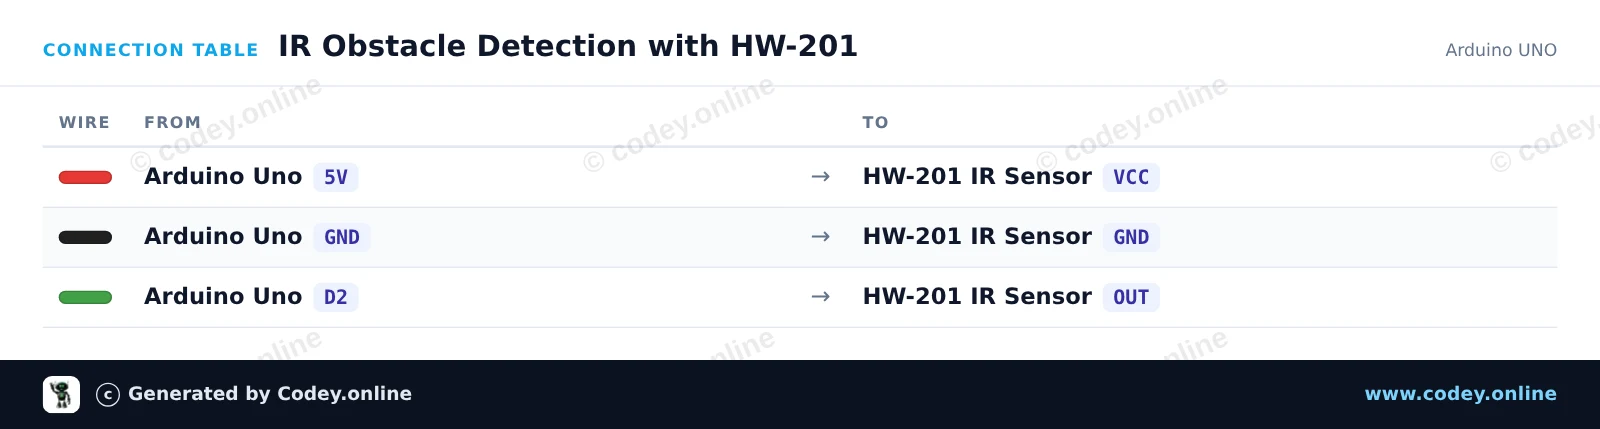
/*
 * ==================================================================
 *  Generated by Codey.online  —  https://www.codey.online
 * ==================================================================
 *  Project   : IR Obstacle Detection with HW-201
 *  Board     : Arduino UNO (arduino:avr:uno)
 *  Parts     : HW-201 Infrared Obstacle Avoidance Module
 *  Libraries : none (built-in)
 *
 *  Codey Online is an AI-powered browser IDE for Arduino and ESP32.
 *  Describe your project and Codey writes the code, draws the wiring
 *  diagram and uploads it to your board, straight from the browser.
 *  This code is free to use, modify and share, without warranty.
 * ==================================================================
 */

// Pin definitions
const int sensorPin = 2;
const int ledPin = 13;

void setup() {
  pinMode(sensorPin, INPUT);
  pinMode(ledPin, OUTPUT);

  Serial.begin(115200);
  Serial.println(F("HW-201 IR Obstacle Sensor Demo"));
  Serial.println(F("Ready: Move an object in front of the sensor."));
}

void loop() {
  // The HW-201 sensor outputs LOW when an obstacle is detected
  int sensorState = digitalRead(sensorPin);

  if (sensorState == LOW) {
    digitalWrite(ledPin, HIGH);
    Serial.println(F("Obstacle Detected!"));
  } else {
    digitalWrite(ledPin, LOW);
    Serial.println(F("Clear (no obstacle)"));
  }

  delay(200);
}Wiring diagram and example code generated by Codey.online — https://www.codey.online
Dieses Projekt liest den digitalen Ausgang des HW-201 Infrared Obstacle Avoidance Module aus. Wenn ein Objekt innerhalb der Reichweite erkannt wird, geht der Sensor-Ausgang auf LOW, wodurch die eingebaute LED des ESP32 aufleuchtet und eine Warnung im Serial Monitor ausgegeben wird. Du kannst die Erkennungsdistanz mit dem Potentiometer auf dem Modul anpassen.
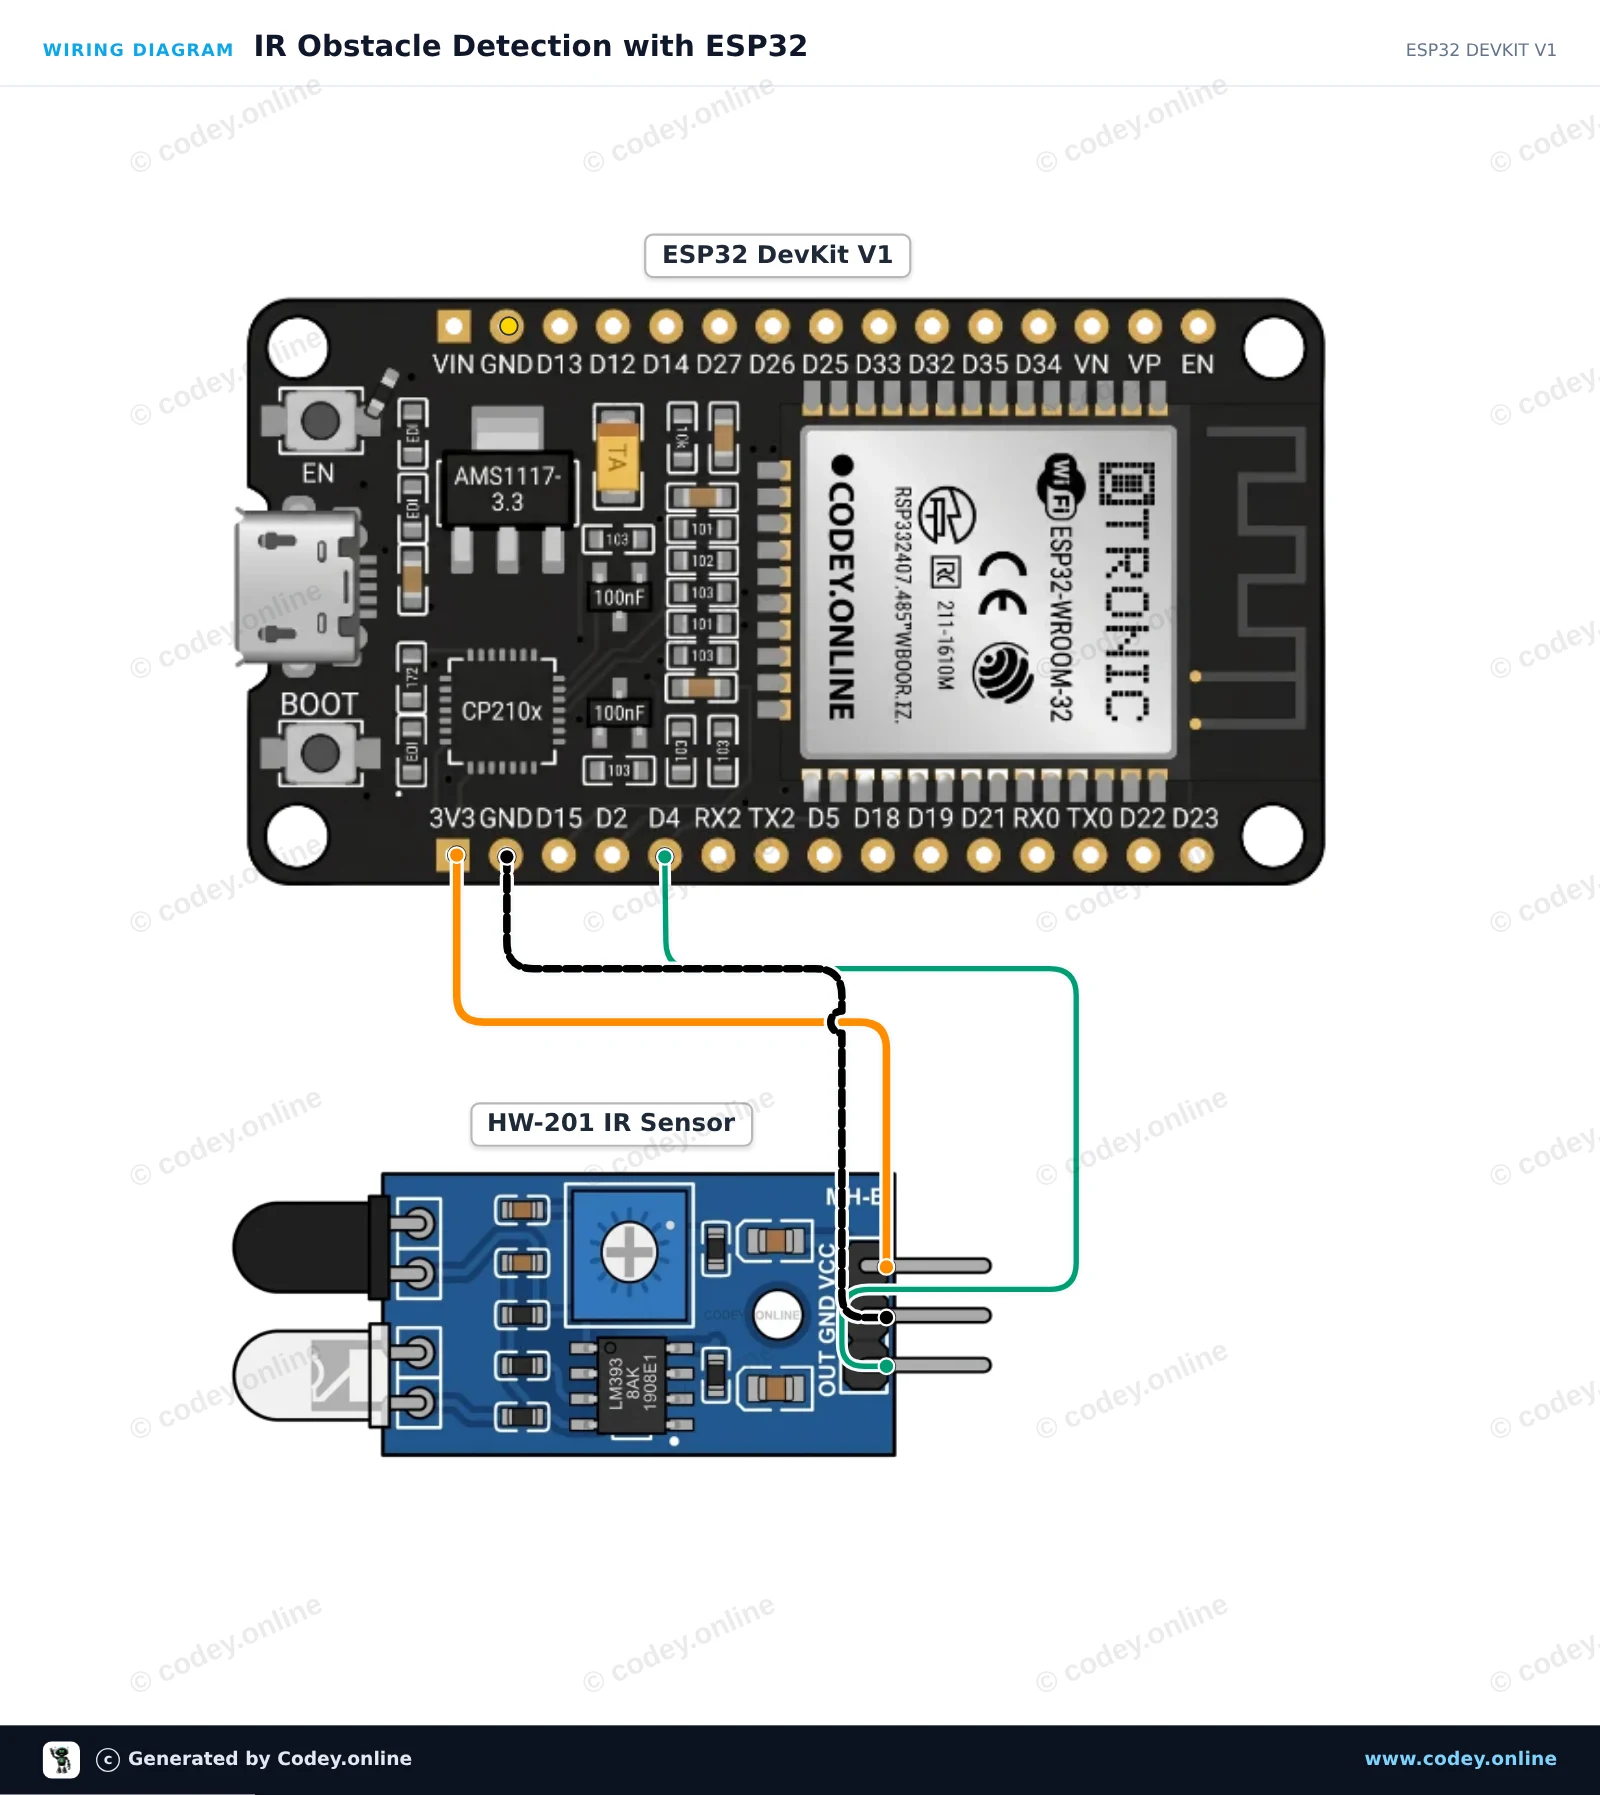
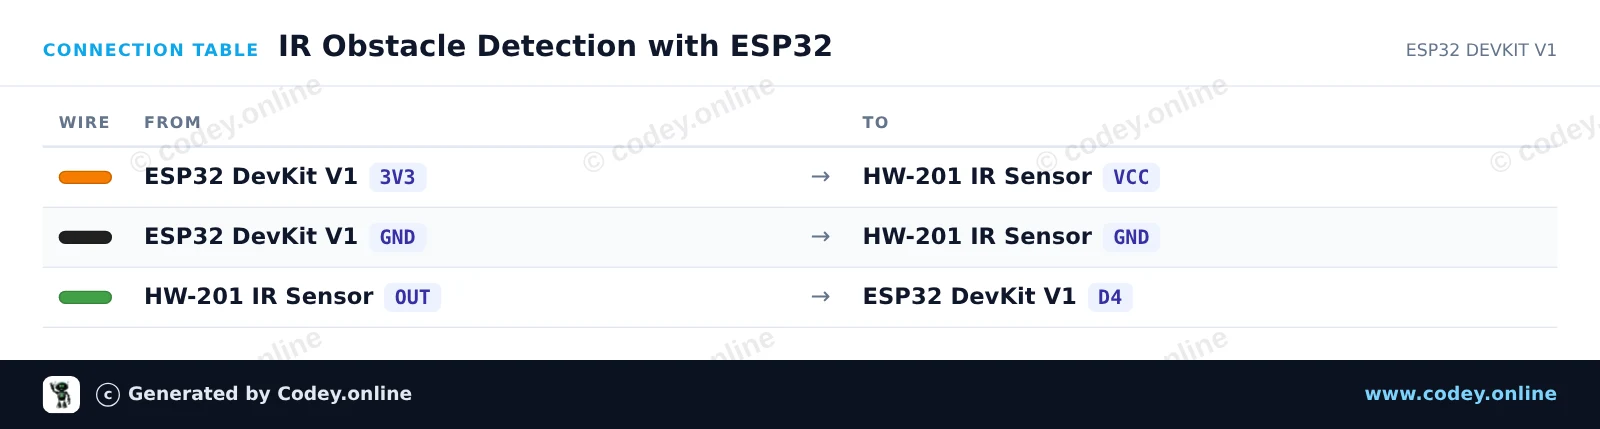
/*
 * ==================================================================
 *  Generated by Codey.online  —  https://www.codey.online
 * ==================================================================
 *  Project   : IR Obstacle Detection with ESP32
 *  Board     : ESP32 DEVKIT V1 (esp32:esp32:esp32doit-devkit-v1)
 *  Parts     : HW-201 Infrared Obstacle Avoidance Module
 *  Libraries : none (built-in)
 *
 *  Codey Online is an AI-powered browser IDE for Arduino and ESP32.
 *  Describe your project and Codey writes the code, draws the wiring
 *  diagram and uploads it to your board, straight from the browser.
 *  This code is free to use, modify and share, without warranty.
 * ==================================================================
 */

// HW-201 IR Obstacle Sensor with ESP32
const int SENSOR_PIN = 4;   // Connected to OUT pin of HW-201
const int LED_PIN = 2;      // Onboard LED

void setup() {
  Serial.begin(115200);
  pinMode(SENSOR_PIN, INPUT);
  pinMode(LED_PIN, OUTPUT);

  Serial.println("HW-201 Obstacle Sensor Ready");
}

void loop() {
  // The HW-201 output is active-LOW (LOW when an obstacle is detected)
  int sensorState = digitalRead(SENSOR_PIN);

  if (sensorState == LOW) {
    digitalWrite(LED_PIN, HIGH);
    Serial.println("Obstacle detected!");
  } else {
    digitalWrite(LED_PIN, LOW);
    Serial.println("Path clear");
  }

  delay(200);
}Wiring diagram and example code generated by Codey.online — https://www.codey.online





 English
  Nederlands
  Frans
Frans  Italiano
  Español
  Suomi
Suomi  Polski
  Dansk
Dansk  Ελληνικά
  Български
  Čeština
  Hrvatski
  Aileen