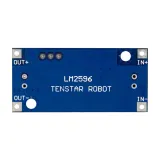
SKU: OT2073-B48 Artikelnummer: AA104 EAN: 4772496877447

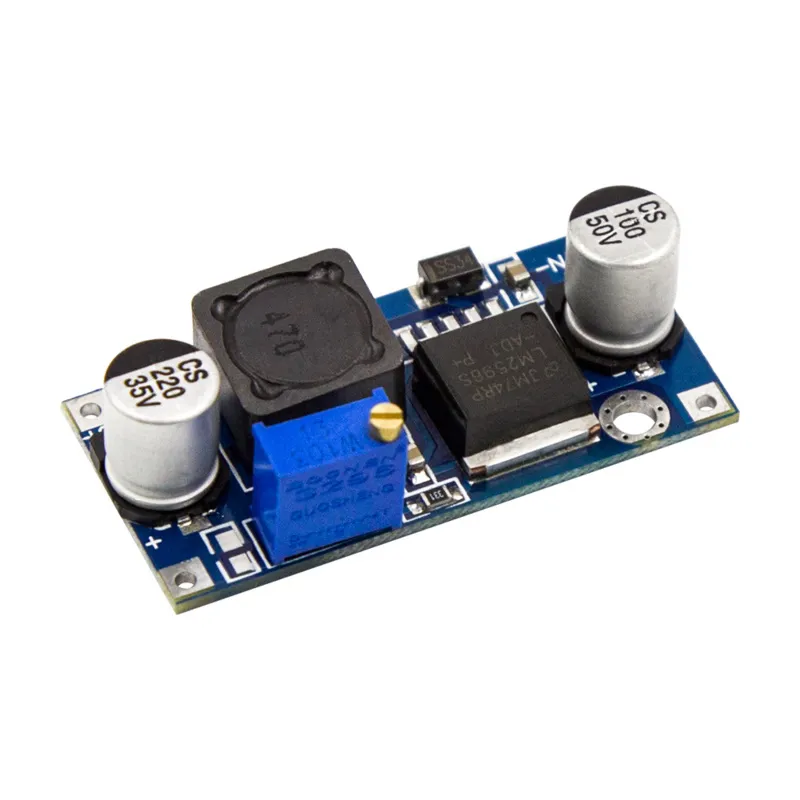
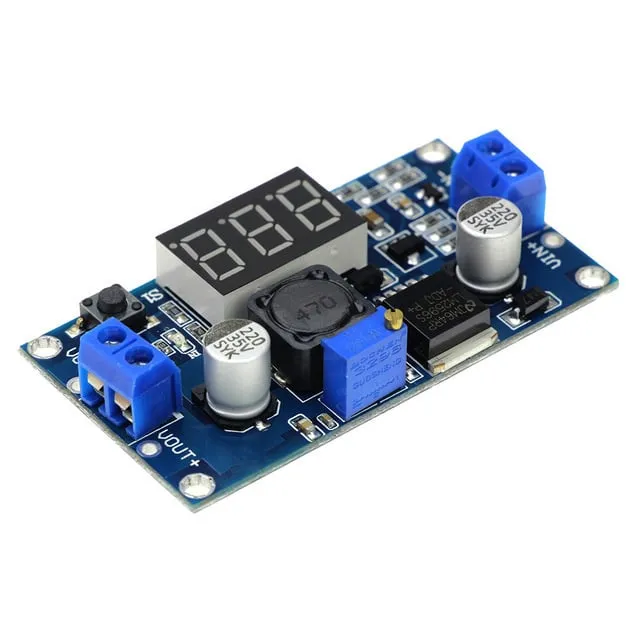
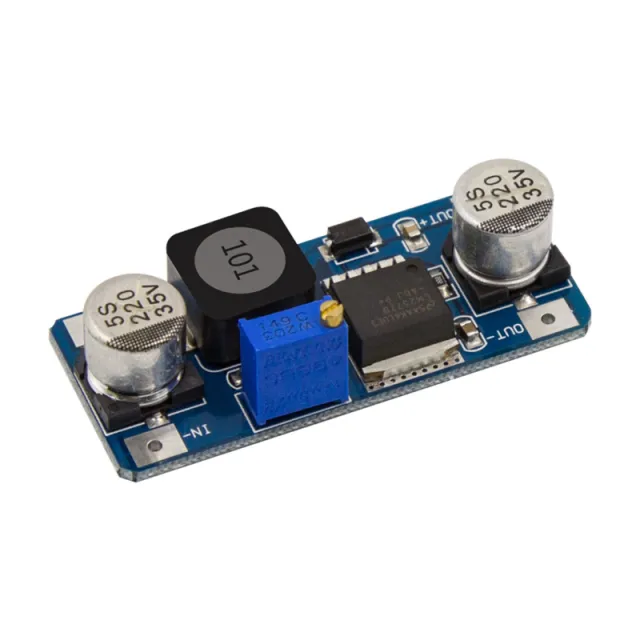
Mit dem LM2596 Step-down-Modul können Sie eine DC-Eingangsspannung zwischen 3V und 40V in eine einstellbare DC-Ausgangsspannung von 1.5V bis 35V umwandeln. Das LM2596-Modul stabilisiert die Ausgangsspannung und bleibt stabil, solange die Eingangsspannung nicht weniger als 10% über der Ausgangsspannung liegt. Dies kann beispielsweise beim Versorgen elektronischer Geräte nützlich sein, die mit einer niedrigeren Spannung als der Standardversorgungsspannung arbeiten. Das LM2596-Modul ist mit einem Potentiometer ausgestattet, mit dem die Ausgangsspannung einfach angepasst werden kann.
Das Modul hat einen Ausgangsstrom von maximal 3A bei einem Wirkungsgrad von bis zu 92%. Das LM2596 verfügt über integrierte Schutzfunktionen (wie gegen Überhitzung, Überstrom und Kurzschluss), um sicherzustellen, dass Ihre Geräte sicher versorgt werden.
Technische Spezifikationen:
- Eingangsspannung: 3V - 40V DC
- Ausgangsspannung: 1.5V - 35V DC (einstellbar)
- Maximaler Ausgangsstrom: 3A
- Wirkungsgrad: bis zu 92%
- Integrierte Schutzfunktionen (Überhitzung, Überstrom, Kurzschluss)
- Abmessungen: 43mm x 21mm x 14mm
So schließt du den Einstellbares Step-down-Modul 3-40VDC auf 1.5-35VDC LM2596 an einen Arduino UNO oder ESP32 an, mit einem Beispiel-Sketch, den du direkt hochladen kannst.
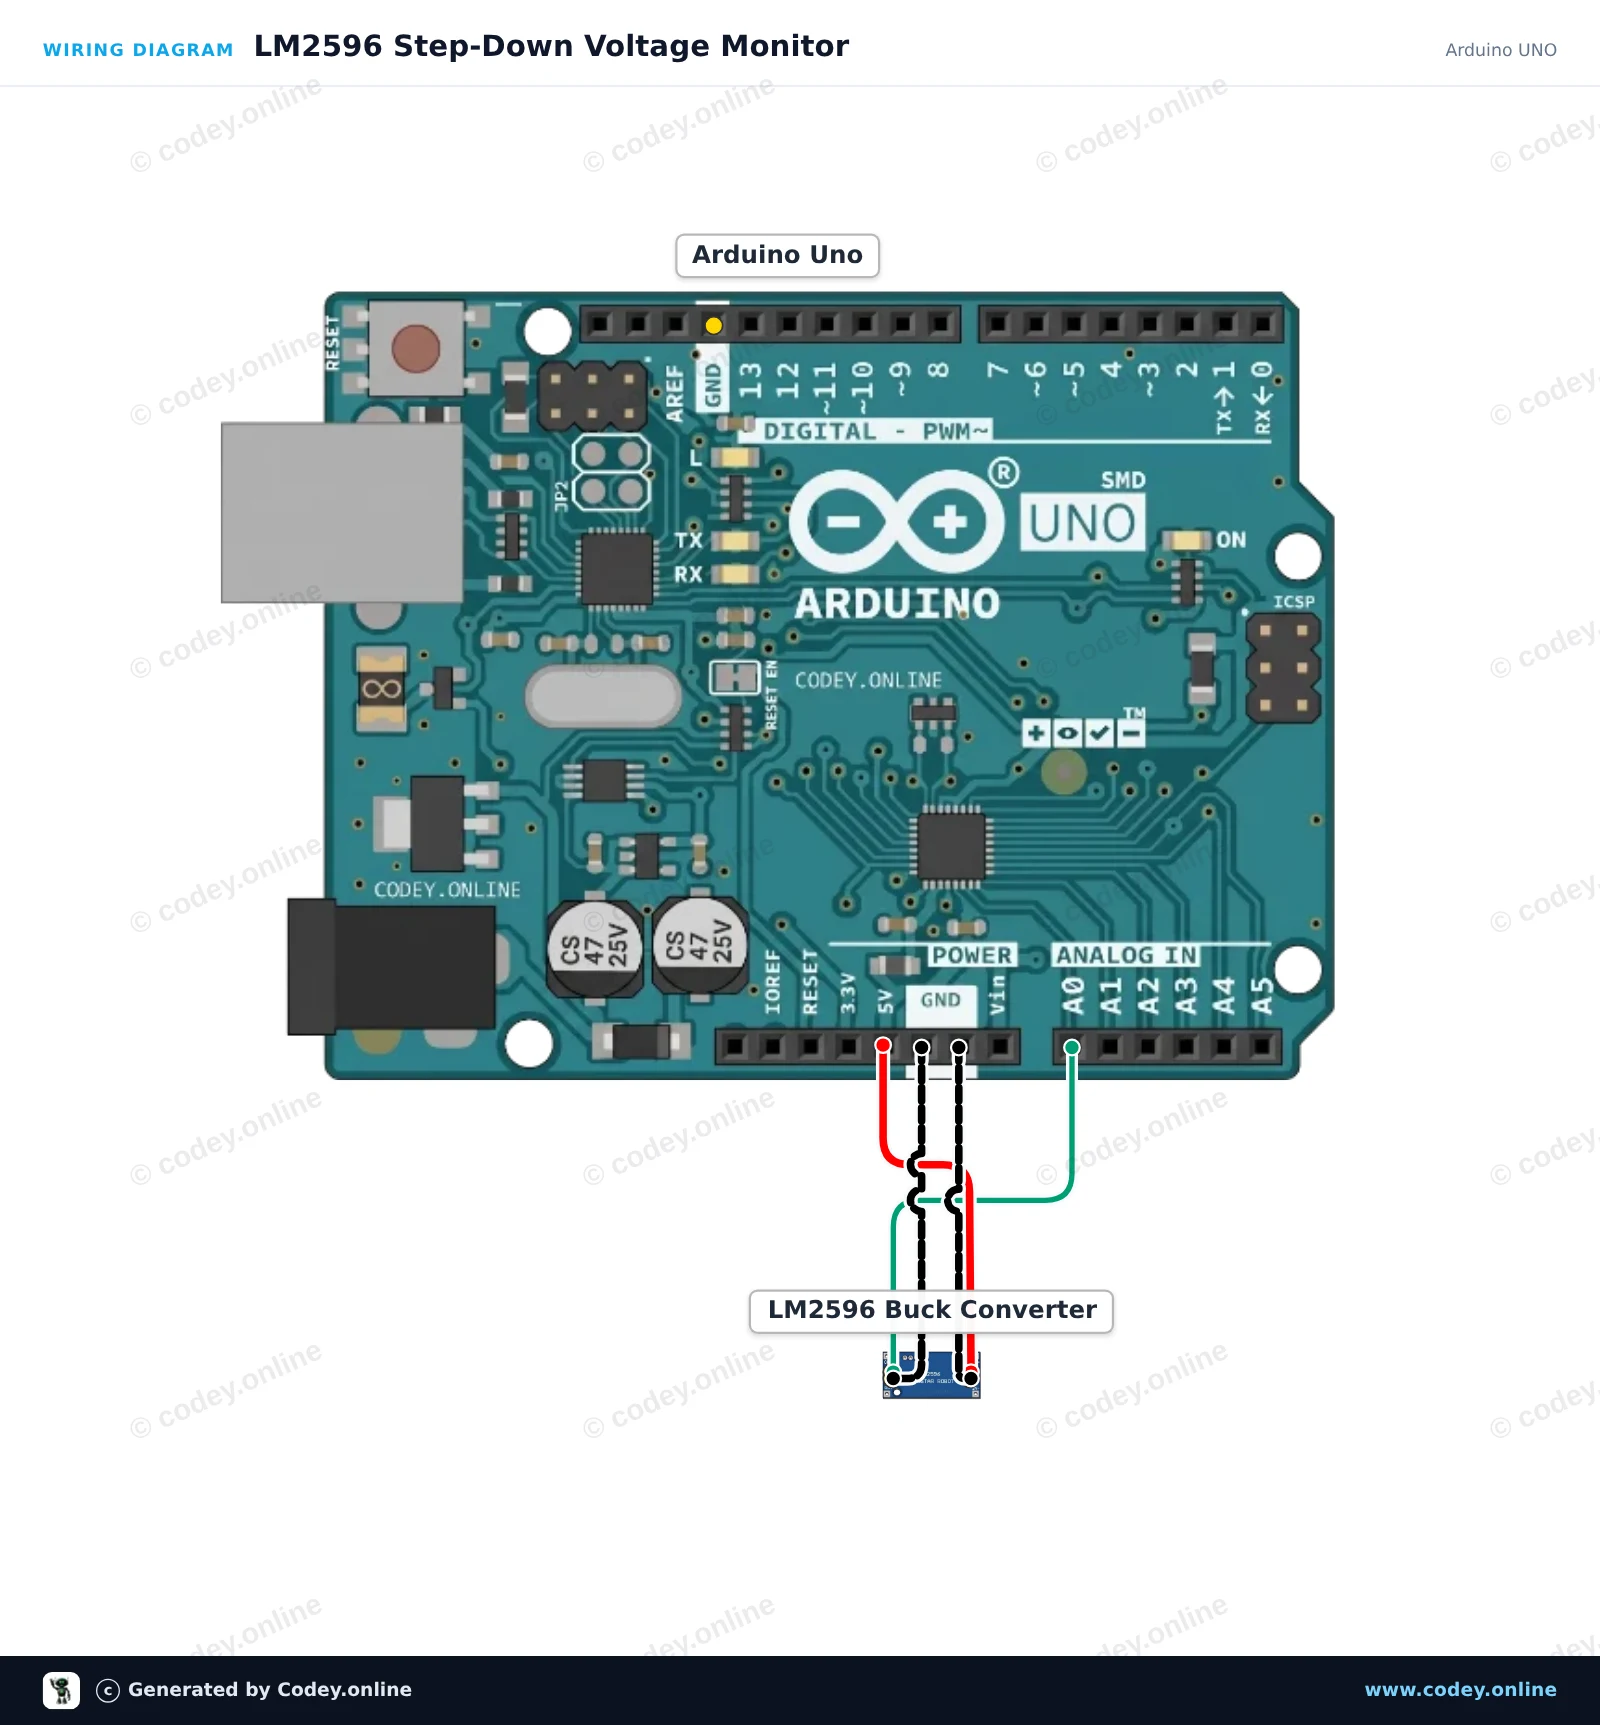
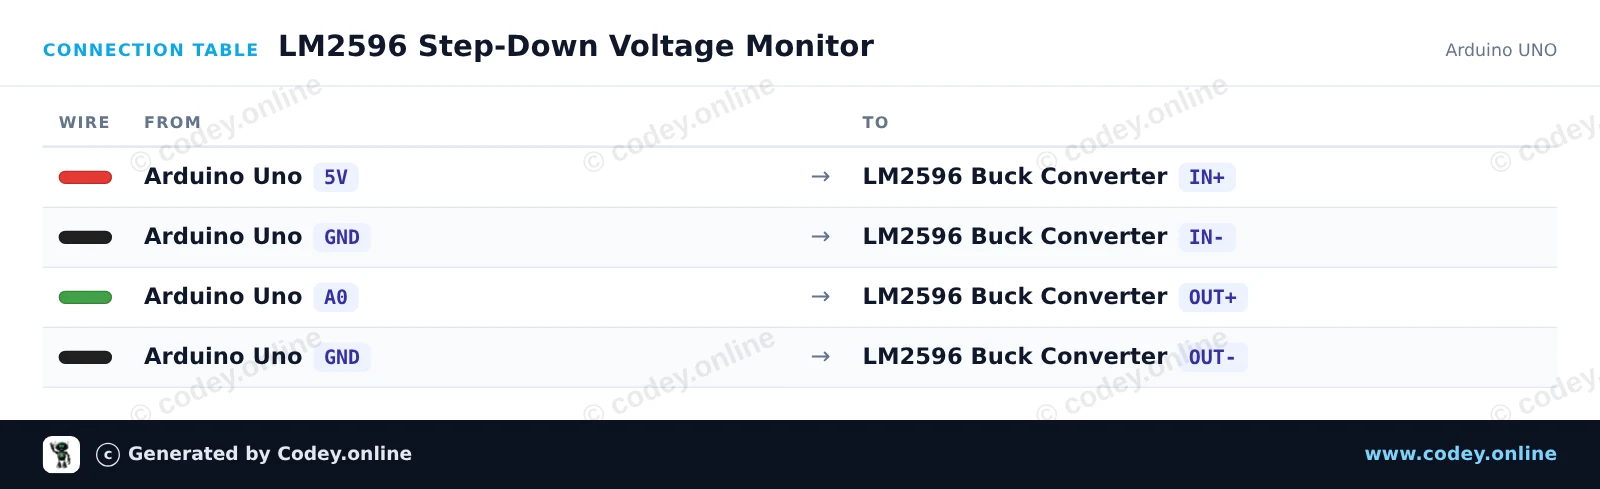
Dieses Projekt überwacht die Ausgangsspannung des einstellbaren LM2596-Abwärtswandlers über den Analogpin A0. Versorge das Modul über den Arduino-5V/VIN-Pin und drehe am eingebauten Potentiometer, um zu sehen, wie sich die gemessene Spannung im Serial Monitor aktualisiert (stelle sicher, dass die Ausgangsspannung 5V nicht überschreitet).
/*
 * ==================================================================
 *  Generated by Codey.online  —  https://www.codey.online
 * ==================================================================
 *  Project   : LM2596 Step-Down Voltage Monitor
 *  Board     : Arduino UNO (arduino:avr:uno)
 *  Parts     : Adjustable Step-down Module 3-40VDC 1.5-35VDC LM2596
 *  Libraries : none (built-in)
 *
 *  Codey Online is an AI-powered browser IDE for Arduino and ESP32.
 *  Describe your project and Codey writes the code, draws the wiring
 *  diagram and uploads it to your board, straight from the browser.
 *  This code is free to use, modify and share, without warranty.
 * ==================================================================
 */

// LM2596 Buck Converter Voltage Monitor
// Reads the regulated output on analog pin A0.
// Note: Keep the output voltage at or below 5.0V to protect the analog pin.

const int sensePin = A0;

void setup() {
  Serial.begin(115200);
  while (!Serial) {
    ; // Wait for Serial Monitor
  }
  Serial.println(F("LM2596 Step-Down Voltage Monitor Initialized"));
  Serial.println(F("Adjust the trimmer potentiometer on the module."));
}

void loop() {
  int rawValue = analogRead(sensePin);
  float voltage = rawValue * (5.0 / 1023.0);

  Serial.print(F("ADC Value: "));
  Serial.print(rawValue);
  Serial.print(F(" | Output Voltage: "));
  Serial.print(voltage, 2);
  Serial.println(F(" V"));

  delay(500);
}Wiring diagram and example code generated by Codey.online — https://www.codey.online
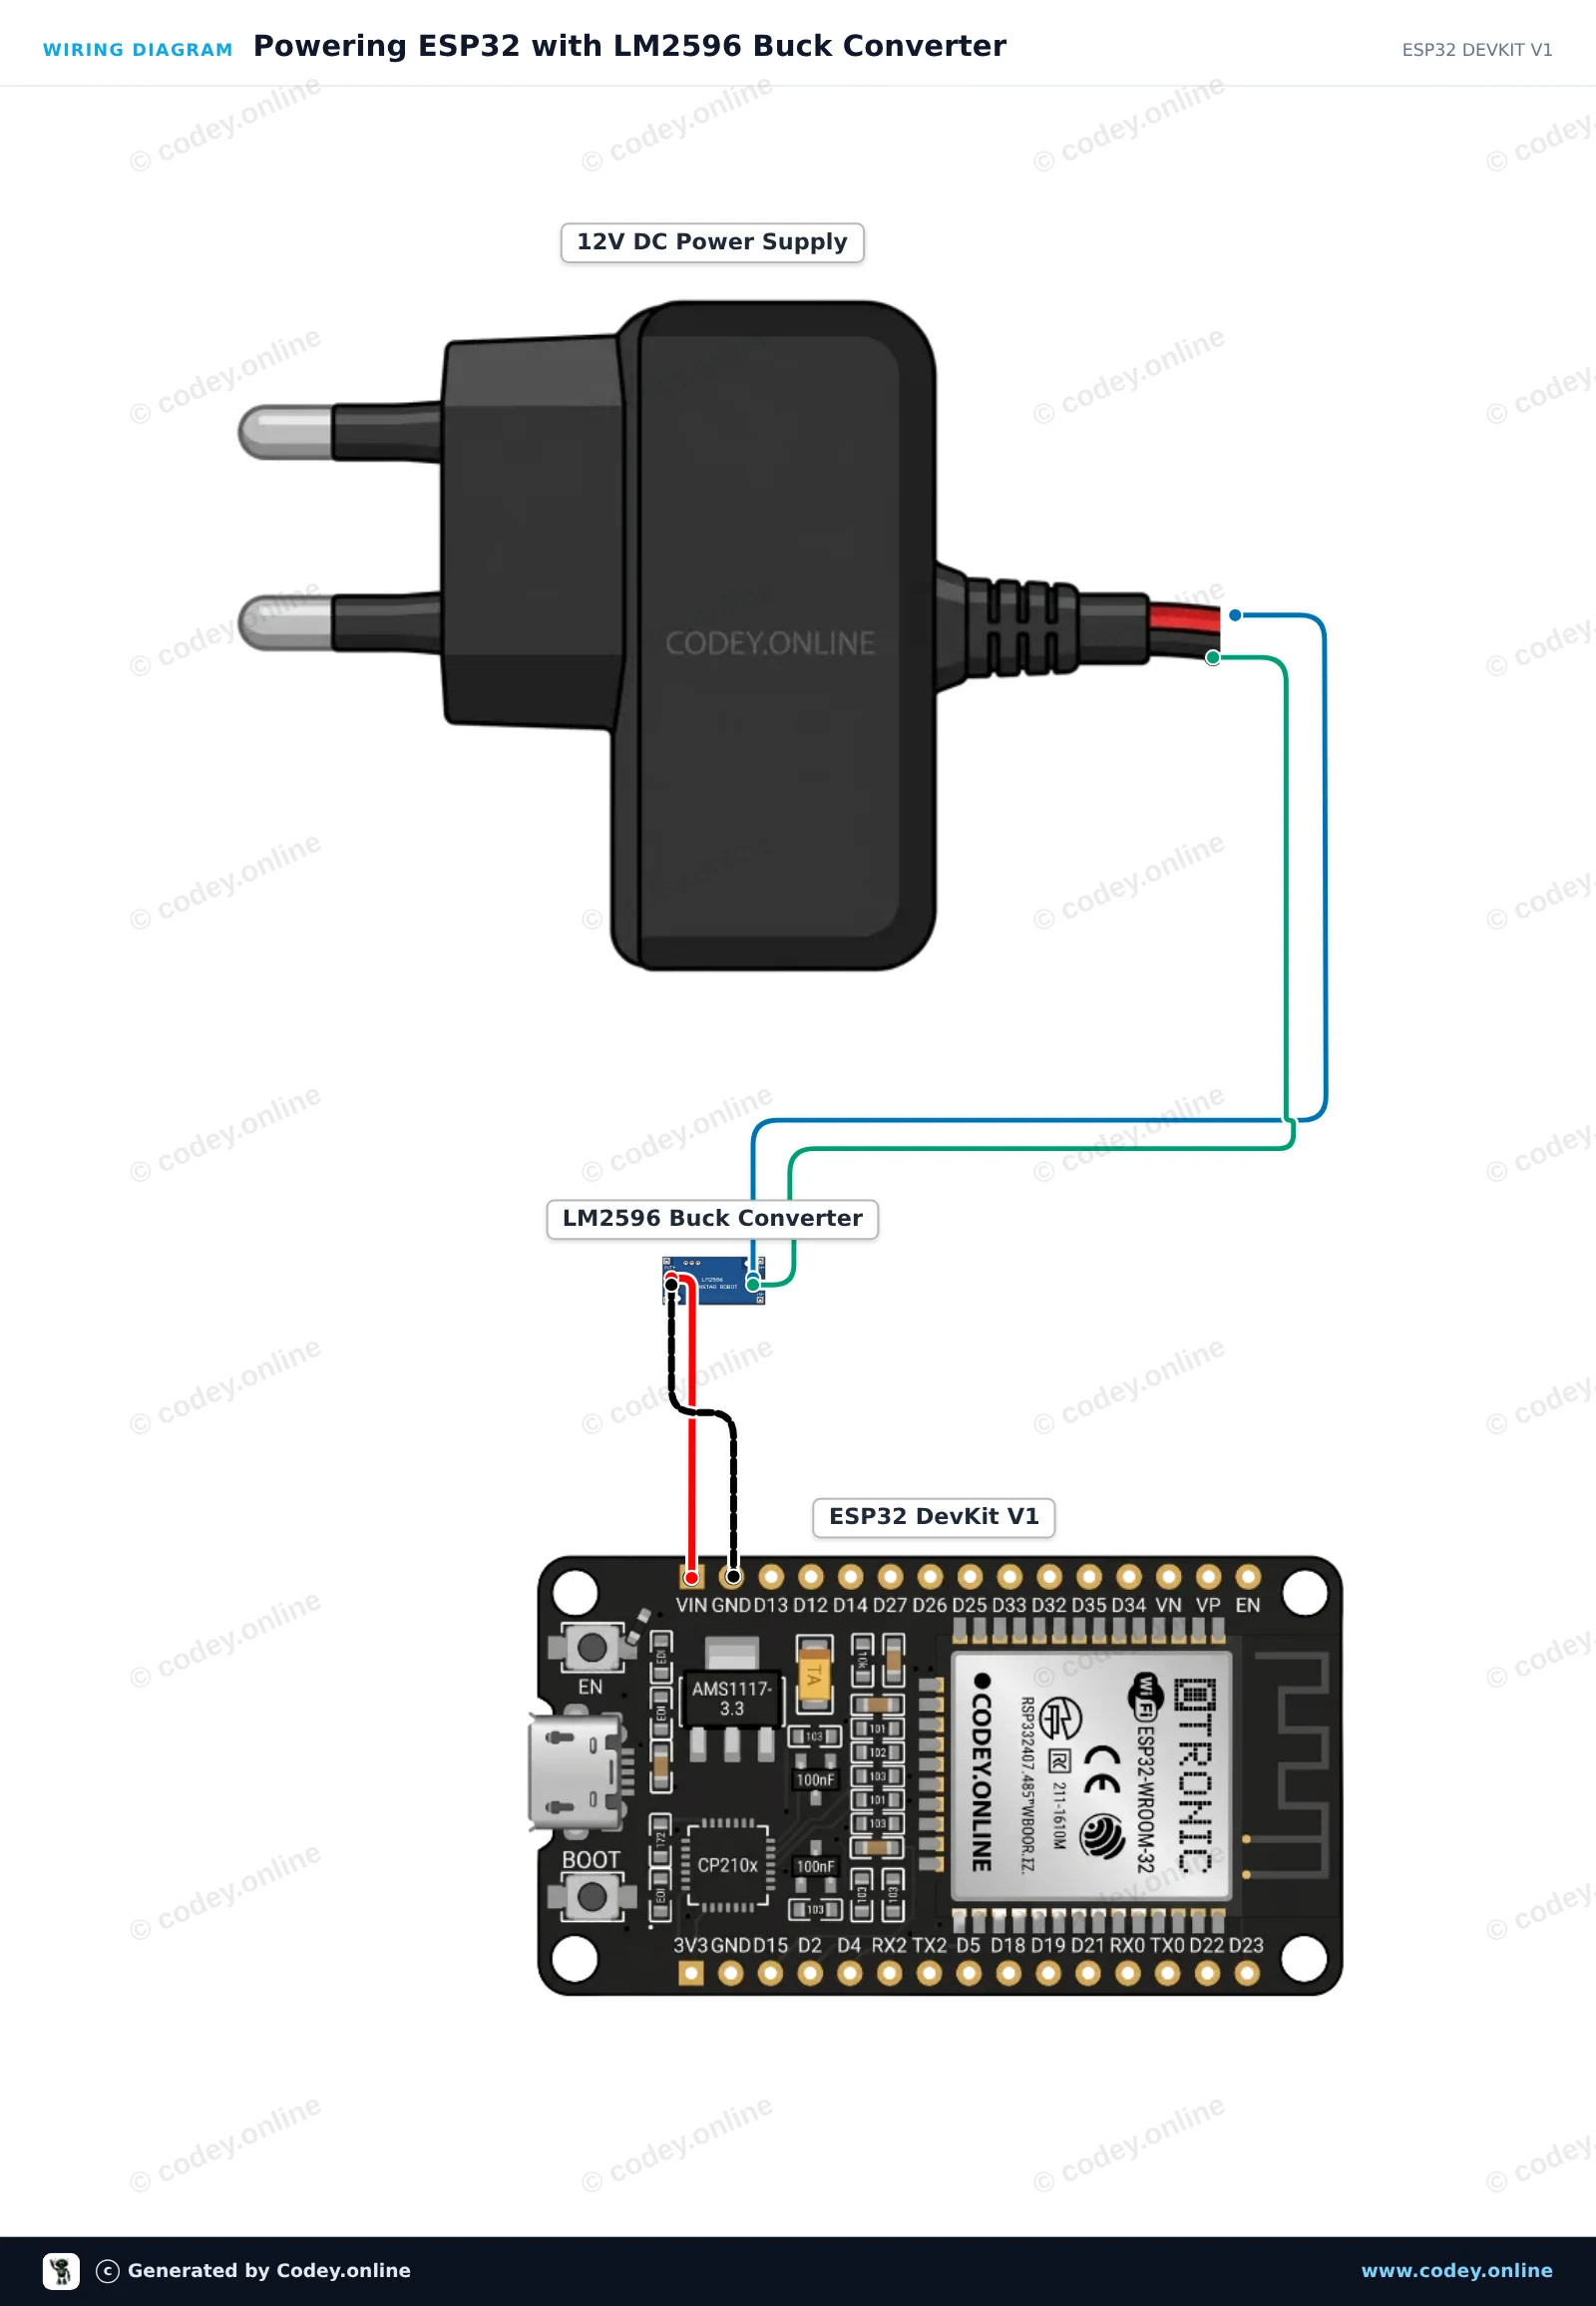
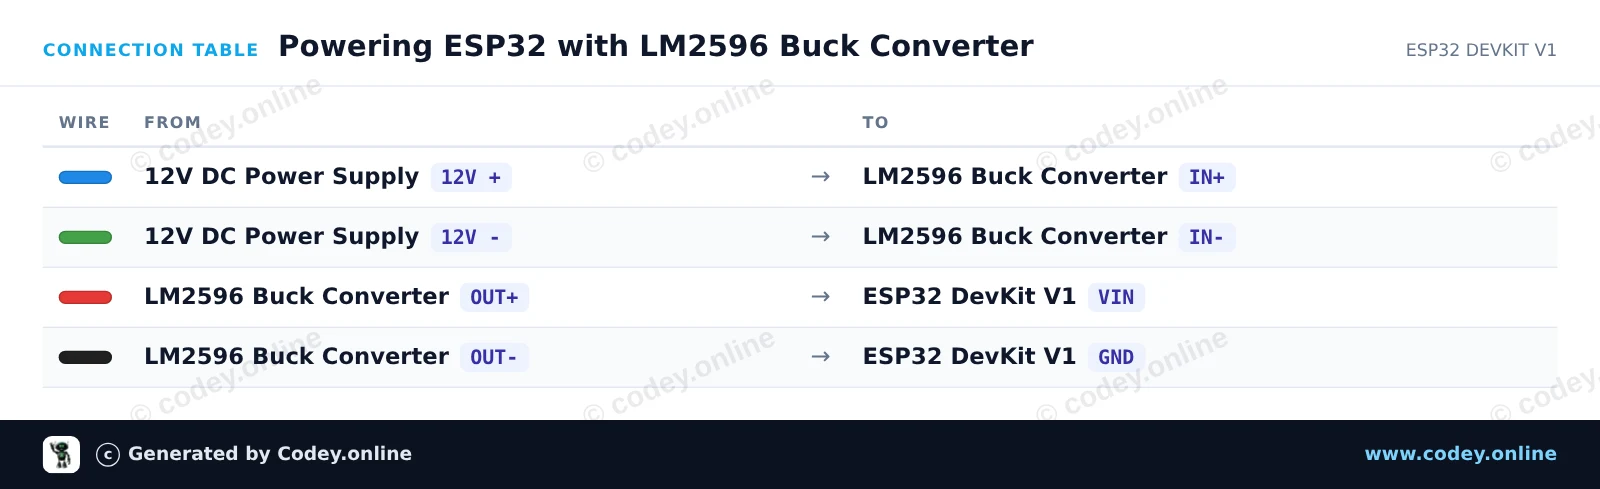
Dieses Setup verwendet das LM2596 Step-Down-Modul, um eine 12V-DC-Stromquelle auf 5V zu regeln und den ESP32 über seinen VIN-Pin zu versorgen. Bevor du den Ausgang mit dem ESP32 verbindest, verwende ein Multimeter und drehe am onboard Trimmer-Potentiometer, bis die Ausgangsspannung exakt 5.0V beträgt. Der ESP32 blinkt seine onboard Status-LED und meldet die Laufzeit über Serial, um einen stabilen Betrieb zu bestätigen.
/*
 * ==================================================================
 *  Generated by Codey.online  —  https://www.codey.online
 * ==================================================================
 *  Project   : Powering ESP32 with LM2596 Buck Converter
 *  Board     : ESP32 DEVKIT V1 (esp32:esp32:esp32doit-devkit-v1)
 *  Parts     : Adjustable Step-down Module 3-40VDC 1.5-35VDC LM2596
 *  Libraries : none (built-in)
 *
 *  Codey Online is an AI-powered browser IDE for Arduino and ESP32.
 *  Describe your project and Codey writes the code, draws the wiring
 *  diagram and uploads it to your board, straight from the browser.
 *  This code is free to use, modify and share, without warranty.
 * ==================================================================
 */

// Onboard LED on ESP32 DevKit V1 is on GPIO 2
const int LED_PIN = 2;

void setup() {
  Serial.begin(115200);
  pinMode(LED_PIN, OUTPUT);

  Serial.println("LM2596 Step-Down Module ESP32 Power Demo");
}

void loop() {
  digitalWrite(LED_PIN, HIGH);
  Serial.print("ESP32 running stably on buck converter power. Uptime: ");
  Serial.print(millis() / 1000);
  Serial.println(" s");
  delay(1000);

  digitalWrite(LED_PIN, LOW);
  delay(1000);
}Wiring diagram and example code generated by Codey.online — https://www.codey.online





 English
  Nederlands
  Frans
Frans  Italiano
  Español
  Suomi
Suomi  Polski
  Dansk
Dansk  Ελληνικά
  Български
  Čeština
  Hrvatski
  Aileen